The Tile Roof Installation Process (Austin Homeowner Guide)

The Tile Roof Installation Process (Austin Homeowner Guide)

What This Guide Covers

Tile roof installation isn’t a shingle install with heavier material. It’s a completely different discipline that takes 4 to 7 days on a typical Austin home, involves batten systems that shingle installers don’t use, and requires understanding how the tile interacts with wind, hail, and its own weight over decades. If you’re comparing quotes from Austin tile roofers, watching your own installation happen, or considering tile for a future project, this guide walks through the process end to end. If you’re ready to skip the education phase and get a quote, our tile installation team page covers the tile materials we install and how we approach the work. If you’re comparing tile against other materials, our our installation page is the hub for all our residential installation content.

This guide is written from the perspective of Austin Roofing Company & Water Damage (WDR), a GAF Master Elite roofing contractor based in Austin, Texas. We’ve been installing tile roofs across the metro since 2012, hold 1,510+ five-star Google reviews, and run W-2 crews (not day-labor subcontractors), which matters especially on tile installations where installer experience directly affects roof life. We’re fully insured with general liability and workers’ comp, and we hold BBB A+ accreditation.

You’ll get: what materials go into a tile installation and why they’re different from shingle materials, the day-by-day installation sequence, why underlayment is the single most important thing to understand about tile ownership, how tile weight affects your framing, common installation mistakes and how to spot them, warranty and credential signals to look for, and timing considerations for scheduling. We’ll also cover the differences between clay, concrete, and synthetic tile at the level of detail that actually matters when you’re picking a product.

One note before we dive in: tile installation is more contractor-dependent than shingle installation. The same tile product installed by two different crews can produce roofs with meaningfully different life spans. So while the material choice matters, the crew’s experience with tile specifically matters more.

What Materials Actually Go Into a Tile Installation

new roofTile roofs have more component layers than shingle roofs, and the components themselves are different. Here’s what goes into a modern residential tile installation and why each layer matters.

Roof deck: the plywood or OSB sheathing on your framing. Same as shingle roofs but the load requirements are higher because tile weighs 3 to 5 times more than shingles. Any rot, delamination, or split boards get replaced during installation.

Drip edge: metal flashing at eaves and rakes. Aluminum or galvanized steel. Installed before underlayment at the eaves.

Ice and water shield: self-adhering waterproof membrane at penetrations, valleys, and often across the full first course above the eaves. Provides the critical secondary water barrier that tile roofs depend on for waterproofing longevity.

Peel-and-stick underlayment: the primary water barrier on a tile roof. Unlike shingle roofs where the underlayment is a backup to the shingles, on a tile roof the underlayment IS the water barrier and the tile is the wear surface protecting it. Peel-and-stick modified bitumen products (GAF StormGuard, Grace Ice & Water Shield HT, similar) are the current standard. They cost more than felt but last 30 to 40 years vs 20 to 25 for felt.

Batten strips: horizontal wood strips (typically 1-by-2 or 2-by-2 pressure-treated lumber) fastened across the roof plane. The tile hooks onto the battens, which creates the air gap that helps tile roofs run cooler than shingle roofs and provides mechanical fastening points. Spacing is specific to the tile profile being installed.

Metal flashing: at valleys, chimneys, sidewalls, and any roof-to-wall or roof-to-anything transition. Custom-cut and integrated with both the underlayment and the tile. This is one of the most skill-dependent parts of tile installation.

Tile itself: clay, concrete, or synthetic composite. Comes in a range of profiles (S-tile, flat, barrel, mission). Each individual tile gets fastened to the batten strips with nails, screws, or a combination of mechanical fasteners and adhesive foam.

Ridge and hip tiles: specifically-shaped tiles designed to cap the ridges and hips. Set with mortar (traditional) or adhesive foam (modern). Not cut from field tiles.

Ventilation components: ridge vents and soffit vents, same as shingle roofs, but the tile air gap adds a passive ventilation layer that shingle roofs don’t have.

The Installation Process, Step by Step

This section is the HowTo core of the guide. A typical tile installation on a 25 to 35 square Austin home takes 4 to 7 working days, roughly two to three times longer than an asphalt shingle installation of the same size. Here’s the day-by-day sequence.

Step 1: Setup, protection, and framing verification (Day 1 morning)

Crew arrives, sets up ground protection (tarps, landscape covers, HVAC and pool equipment covers), and verifies the framing capacity documentation before touching the existing roof. On new tile installations or conversions from a lighter material, this is the day the engineer’s framing analysis gets confirmed against the actual attic conditions. Safety harnesses go on. Roof jacks and ladders get set.

Step 2: Tear-off (Day 1)

If replacing an existing roof, tear-off happens next. Removing tile is careful, slow work compared to tearing off shingles, particularly if any tile might be salvageable for reuse or spare stock. Battens and underlayment come off. Then a full deck inspection identifies any decking that needs replacement.

Step 3: Underlayment (Days 2 through 3)

Peel-and-stick underlayment goes down across the entire deck, starting at the eaves and working up. Each course overlaps the previous by manufacturer spec (typically 3 to 6 inches). All penetrations get sealed with additional membrane and mastic. Valleys and any hip or ridge transitions get double-layered. This is the actual waterproofing of the roof, so it happens slowly and carefully.

Step 4: Batten installation (Day 3)

Horizontal battens get fastened to the deck through the underlayment. Batten spacing is specific to the tile profile: different tile shapes require different batten intervals, and the crew has a batten spacing chart for the specific product being installed. Battens must be straight, level, and consistently spaced or the finished tile courses will look wavy.

Step 5: Tile setting (Days 4 through 6)

Tiles get set course by course from the eaves up. Each tile hooks onto the batten and gets fastened with the manufacturer-specified fastener (nails or screws through pre-drilled holes, or a combination of one mechanical fastener plus adhesive foam). Edge tiles and rake tiles get custom-cut to fit. Valley tiles get precisely cut to match the valley angle. Every custom cut has to look intentional.

Step 6: Ridge, hip, and cleanup (Day 6 or 7)

Ridge and hip tiles get set with matching-profile caps. Mortar (traditional method) or adhesive foam (modern method) secures them. Vents get integrated. Flashing at chimneys, sidewalls, and dormers gets custom-fit and sealed. Ground crew does final cleanup. Magnetic sweep picks up any nails. Homeowner walkthrough covers the installed spec, any deck repairs, and warranty documentation.

Underlayment, The Component That Actually Determines Tile Roof Life

asphalt roofing for commercial establishmentThis is the section that most tile roofing content skips, and it’s the single most important thing for a tile homeowner to understand. Tile itself lasts 75 to 100 years. The underlayment beneath the tile doesn’t last that long.

The underlayment is the waterproof membrane between the deck and the tile. It’s the actual water barrier on your roof. The tile is the wear surface that protects the underlayment from UV, hail, and physical damage. When the underlayment fails, the roof leaks even though every tile above it looks perfect. This is why an experienced inspection team examines underlayment condition as the primary indicator of tile roof life expectancy, not tile condition.

Standard felt underlayment lasts 20 to 25 years under tile in Austin’s climate. High-performance synthetic underlayments (peel-and-stick modified bitumen) push to 30 to 40 years. That means a tile roof installed today with quality underlayment will typically need an underlayment replacement somewhere between year 30 and year 40, well before the tile itself has failed.

Underlayment replacement requires removing all the tile, replacing the underlayment, and reinstalling the tile. The tile itself typically stays (if it’s still in good shape), so material cost is much lower than a full new roof, but labor cost is high because the tile has to come off and go back on carefully. This is normal maintenance for tile ownership, not a defect or a surprise.

For new installations, we spec peel-and-stick synthetic underlayment as the default even though it costs more up front than felt. The 10 to 15 extra years of underlayment life justifies the up-front cost easily over the 75 to 100 year life of the tile system.

If you own a tile roof and don’t know how old the underlayment is (common with older homes where installation records are lost), a targeted underlayment inspection can identify current condition and rough remaining life. Lifting a handful of tiles at representative locations gives an accurate read on underlayment condition across the roof plane.

Framing, Weight, and Structural Checks

Tile weighs 6 to 10 pounds per square foot depending on the specific product. Compare that to 2 to 3 pounds for asphalt shingles and you can see why framing capacity matters more for tile than for any other residential roofing material.

Newer Austin custom homes designed for tile from the start typically have adequate framing without modification. The framing engineer sized rafters, ridge beams, and load paths for the intended tile weight, so the roof structure handles the load without issue.

Older Austin homes originally built for asphalt shingles usually don’t have adequate framing for tile. Rafters may be undersized, ridge beams may be marginal, and the roof deck fastening may not handle the concentrated loads from tile foot traffic during installation. In these cases, framing reinforcement (sistering rafters, adding ridge support, upgrading deck fasteners) is required before tile can be installed.

A structural engineer’s evaluation is the responsible answer when framing capacity is uncertain. If you’re considering replacing your roof and switching from a lighter material to tile, budget for the engineering evaluation and any required framing work as part of the project cost, not as a surprise later.

Some homes fall into a middle category: adequate for concrete tile but not for clay. Concrete tile runs 6 to 8 pounds per square foot; clay can push 9 to 10 pounds. If your framing barely handles the lighter option, choosing concrete over clay might be the cost-effective solution vs full framing reinforcement.

Synthetic composite tile is the option for homes where real tile isn’t practical. At 1 to 2 pounds per square foot, synthetic tile weighs less than asphalt shingles and installs on virtually any framing. The trade-off is a shorter life span (50 years vs 75 to 100 for real tile) and a slightly less convincing aesthetic at close range.

Common Tile Installation Mistakes and How to Spot Them

Tile installation quality varies more widely than shingle installation quality, mostly because the skill barrier is higher and fewer Austin roofers have real experience. Here are the mistakes we see most often when we’re called in to inspect other contractors’ tile work.

Wrong batten spacing: each tile profile has a specific batten spacing requirement. Wrong spacing causes tiles to fit poorly, gaps to appear at course transitions, or tiles to not seat correctly against the batten. From the ground, watch for wavy or inconsistent course lines. Up close, you can sometimes see tiles that don’t sit flush.

Skipping peel-and-stick underlayment: some contractors use standard felt underlayment on tile installations to save cost. It’s a false economy that shortens the effective life of the roof system dramatically. If a tile installation quote uses felt underlayment, ask why. If you’re seeing hail damage services on your tile roof more often than expected, one common cause is underlayment failure that’s letting water past the tile at every impact.

Wrong fastener depth or type: tile fasteners have to hold the tile without overdriving or splitting it. Using shingle nails on tile, using the wrong length screw, or overdriving fasteners with an air gun all cause premature tile failure. Broken tiles at nail points 3 to 5 years after installation is a symptom.

Cut field tiles used as ridge or hip caps: matching-profile ridge and hip tiles are specifically designed to fold over ridges without cracking. Cut field tiles used instead often crack within 5 to 10 years and create leaks. From the ground, ridge tiles should look distinctly different from field tiles.

Improper flashing at penetrations: chimney flashing, pipe boots, and skylight flashing on tile roofs require custom-fit metal that integrates with both the underlayment beneath and the tile above. Cheap or generic flashing at these points is one of the top sources of tile roof leaks.

Not addressing broken tiles promptly: individual tile damage is normal on tile roofs. Ignoring it isn’t. A single broken tile exposes the underlayment to UV and physical impact, which accelerates underlayment failure directly beneath the broken tile. Our repair team handles individual tile replacement as a targeted repair rather than requiring a full re-roof.

Warranty and Contractor Credentials for Tile Work

Tile installation warranties work differently from shingle warranties, and it’s worth understanding the differences.

Tile manufacturer warranty: covers the tile itself against defects. For premium clay tile, this is typically 50 years to lifetime. For concrete tile, 30 to 50 years. This warranty covers premature color fading, delamination, or structural failure of the tile as a product. It doesn’t cover damage from impacts, foot traffic during future service work, or failure of the installation itself.

Underlayment manufacturer warranty: separate warranty from the underlayment manufacturer, usually 20 to 30 years for high-performance synthetic products. Coverage typically requires that the product be installed per manufacturer spec.

Installer workmanship warranty: whatever the installing contractor offers. Industry standard is 5 years. We warranty our tile workmanship for 10 years because tile installations that fail from installer error typically fail in the first 3 to 5 years, and we stand behind our crews’ work with a longer warranty than the industry norm.

Credentials to look for on Austin tile installers: verifiable experience with tile specifically (not just general roofing experience, which doesn’t transfer directly), W-2 crews (contract crews rotate more, which affects consistency), fully insured with certificate of insurance available before contract signing, BBB accreditation and Google review depth on tile projects specifically (ask to see photos of past tile work). GAF Master Elite certification, while GAF-focused, indicates the installer meets ongoing training and quality verification requirements that transfer well to tile work.

Tile Installation Timing and Weather Considerations

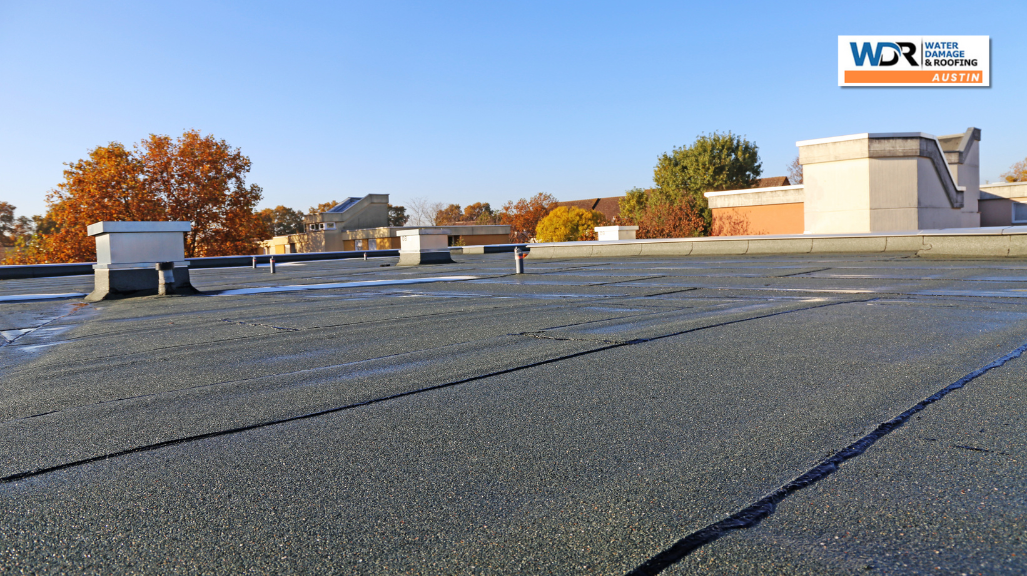
roofer installing a flat roofTile installations take significantly longer than shingle installations (4 to 7 days vs 1 to 3), which affects timing decisions.

Best season for tile installation in Austin: October through April is our lower-demand period. Crews are less rushed, weather is more cooperative for longer projects, and scheduling is easier. May through September is our high season because of storm activity, and tile installations can push out 4 to 8 weeks because we’re careful about which crews handle tile work and won’t assign inexperienced crews to speed things up.

Weather constraints: tile installation is more weather-sensitive than shingle installation because the roof stays partially open longer (multi-day underlayment and batten installation before the tile goes on). Rain during those stages requires stopping and covering the exposed sections. Contractors who install through active rain to keep on schedule are cutting corners that will cost the homeowner later.

Sequential logistics matter: on major projects (custom homes, historic renovations), tile installation typically happens after other roof work (framing, deck, chimney construction) is fully complete. Trying to overlap trades on the roof creates traffic damage to tile before installation is even finished.

If you’re planning a tile installation as part of new construction, budget for a 2 to 3 week window from tear-off (or deck completion) through walkthrough, and don’t schedule interior finish work that requires roof-open access during that window.

Related Reading

If you’re comparing tile against asphalt shingles for a budget-driven or shorter-ownership-horizon project, our asphalt shingle installation guide walks through the shingle process at similar depth. Our asphalt shingle system service page covers our premium asphalt product lines including Class 4 impact-rated options that get you closer to tile’s hail performance at a lower price point.

If you’re considering metal instead of tile as your long-life material choice, our metal panel systems page walks through standing seam and metal panel installation, including the 40 to 70 year life span that puts metal between asphalt and tile on the durability spectrum. If you’d rather skip the education phase and get a quote for tile, call (512) 820-6505 or use the estimate request form.

How long does a tile roof installation take?

A standard 25 to 35 square residential tile installation takes 4 to 7 working days for most Austin homes, roughly two to three times longer than a shingle installation of the same size. Larger, more complex, or new-construction tile jobs can extend to 10 days or more. The extra time comes from batten installation, custom cutting at valleys and rakes, and the tile-setting process itself, which is more careful than shingle-setting.

Do I need to reinforce my framing to install tile?

Sometimes. Newer Austin custom homes designed for tile from the start usually don’t need reinforcement. Older homes originally built for shingles typically do. The determining factor is whether the existing rafters, ridge beams, and deck fasteners were sized for the concentrated 6 to 10 pounds per square foot load that tile creates. A structural engineer’s evaluation gives the definitive answer. Budget for that evaluation as part of any tile conversion project.

What's the difference between clay, concrete, and synthetic tile?

Clay is natural terracotta kiln-fired to hardness, with color running through the full thickness. Longest life (75 to 100 years), heaviest, most expensive. Concrete is Portland cement with surface-applied colorants, 50 to 75 year life, mid-weight, mid-cost. Synthetic composite is polymer-based, mimics real tile at 1 to 2 pounds per square foot (vs 6 to 10 for real tile), 50 year life, lower cost. Choice depends on framing capacity, budget, and aesthetic priorities.

Why does the underlayment on a tile roof matter so much?

Because the underlayment IS the water barrier on a tile roof, not the tile. Tile is the wear surface that protects the underlayment from UV, hail, and physical damage. Tile lasts 75 to 100 years but underlayment lasts 20 to 40 depending on quality. When underlayment fails, the roof leaks even though every tile above looks perfect. That’s why underlayment quality at installation time is the single most important decision for long-term tile roof performance.

Can I install tile over my existing roof?

In almost every case, no. Overlaying tile over existing shingles isn’t structurally viable (the combined weight exceeds framing capacity), hides deck problems that will fail later, voids most manufacturer warranties, and produces a shorter-lived roof. The right approach is always a full tear-off, deck inspection, new underlayment, new batten system, and new tile.

How do I know if a tile installer is any good?

Ask specific questions about their tile experience (not general roofing experience). Ask to see photos of past tile installations, including detail shots of valleys, ridges, and flashing (the skill-dependent parts). Verify insurance (certificate of insurance available on request). Verify BBB status and Google review depth on tile projects specifically. Ask what underlayment they spec (peel-and-stick synthetic is the modern standard). Ask how they handle framing verification before starting. A contractor who can’t answer these questions clearly is a contractor who doesn’t have tile-specific experience.

Metal Roof Installation Cost Guide (2024)

Metal Roof Installation Cost Guide (2024)

Asphalt shingles offer a classic and beautiful look when it comes to roofing, but what if you want a more elegant and durable option? Thanks to these qualities, metal roofs are becoming more and more popular.

The perks of this roofing material are difficult to ignore. Metal roofs offer many benefits, such as longer durability and improved performance, beautiful styles to match any property, maximum wind and fire resistance, and enhanced energy efficiency.

gray metal roofed house

However, there’s one thing about metal roofing systems that really worries property owners – their price.

How much does a metal roof cost? How much money do you need to install this roof on your property and enjoy all its perks?

If you’re looking for the answers to those questions, you’ve come to the right place! This comprehensive and up-to-date guide contains all the information about metal roofing prices and related costs. Read on!

 How Much Does a Metal Roofing Cost on Average?

Metal roofing prices often range from $8,000 to $70,000, as many factors can influence this. However, the average metal roof costs around $11,500.

Why do these prices vary? – In order to answer that question, it’s important to learn more about metal roofing materials. Fortunately, that’s what you can do here.

What You Should Know About Metal Roofing Materials

As mentioned, the materials used to install a metal roof influence the final cost. They come in premeasured sheets, which are typically between 50 and 100 square feet.

However, professional roofing contractors use another measurement system to determine the quantity of materials they’ll need and their costs.

Instead of using the “square feet” measurement, roofing contractors use a “roofing square,” equivalent to 100 square feet.

In addition to the square feet, contractors must also consider the cost of the material to calculate a final price for a new metal roof.

Here’s more information on these costs, using an average 1,700-square-foot American roof as a reference:

Steel Shingles and Tiles

You’ll find many types and options if you prefer steel roofing systems. However, galvanized steel is one of the most popular. This material is coated with zinc, which offers enhanced protection against corrosion. Also, it’s highly durable and sturdy.

Galvanized steel costs between $4.50 and $17 per square foot. However, this price is for the material alone. You should add installation costs, which bring the overall price to $10 per square foot.

As a result, galvanized steel roofs may cost between $7,500 and $29,000. However, it isn’t the most expensive material. You’ll have to pay even more if you want to install a stainless steel roof. These systems are quite expensive, but they’re rare.

steel shingle

Stainless steel materials cost between $7 and $20 per square foot. Therefore, the cost of a complete 1,700-square-foot roof is approximately $12,000-$34,000.

If you think steel shingles and tiles are the best option for your property, you can find cheaper alternatives, such as galvalume. Essentially, it’s aluminum-coated steel and costs only half the price of galvanized steel.

The average price per installed square foot of galvalume steel is $4-$9, which means you would pay between $400 and $900 per sheet and between $7,000 and $16,000 for a full 1,700-square-foot roof.

Aluminum

This material is also resistant to corrosion but has a unique feature that makes it ideal for those who live near the ocean – it protects the roof against saltwater damage.

Additionally, aluminum is one of the cheapest materials you’ll find if you want to install a new metal roof. It costs between $6.50 and $21 per square foot installed.

Although this price is only for the shingles, aluminum is easy to work with, so installation costs are also low. If you want to install a 1,700-square-foot new roof with this material, you’ll likely have to pay between $11,000 and $36,000.

However, aluminum isn’t the best option for those who prioritize the appearance of their properties. Although it offers excellent protection against corrosion and other types of damage, this material dents easily.

In addition, since this material expands and contracts easily, aluminum doesn’t age well and can wear down roofs under certain conditions, especially if there are temperature changes. As a result, you may hear creaking sounds that can be annoying.

Copper Tiles

There’s no doubt that a copper roof is beautiful and unique! That’s why it’s one of the most attractive options. In addition, this material has many advantages. It’s extremely lightweight, but it’s durable enough to last for up to 100 years.

However, the costs of installing a copper roof are considerably high. This roofing material is one of the most expensive on the market. It costs between $20 and $40 per square foot.

On average, installing a new 1,700-square-foot copper roof costs between $35,000 and $70,000.

Zinc Panels

Do you want your new metal roof to be highly resistant and last for years, but you’re on a tight budget? Zinc could be one of the best roofing materials in that case.

It’s more durable than aluminum but costs only a fraction of the price of a copper roof. If well-installed, zinc can last 100 years or even more. Additionally, these systems don’t require regular maintenance.

This material has a self-healing coating, which covers scratches. Therefore, it’ll stay in excellent condition for a long time. Plus, zinc can resist corrosion if properly sealed, specifically on the underside of the panels or shingles.

Regarding prices, zinc panels cost between $6 and $10 per square foot. If you install a 1,700-square-foot zinc roof, costs can range from $24,000 to $36,000.

aerial view of zinc paneled roof

Tin Panels

Pure tin roofs are quite popular in the US. Actually, it was the most widely used material for home roofing across the country a few years ago.

Although it has been slowly replaced by modern roofing materials, this type of roof is still seen in many homes. However, most properties don’t feature systems made of “pure tin” but of “terne,” which is a thin steel sheet coated with a tin alloy.

Actually, terne is considered the new “tin roof.” It isn’t as popular as other materials but offers many benefits, such as high durability and resistance against corrosion.

In addition, tin roofs are versatile. If you use this material and want to give it a unique and beautiful touch, you can paint the panels. However, you can also allow this material to develop its natural matte gray patina over time due to oxidation.

Tin panels usually have different prices, as costs vary depending on the type you choose. However, most cost from $10 to $26. The total price for a 1,700-square-foot roof made of tin can be between $17,000 and $44,500.

Other Factors That Can Influence Metal Roofing Costs

As mentioned, different factors influence how much a metal roof costs. Roofing materials are the main ones, but there are others that you should know in order to calculate how much money you need to install your new system.

Some of the elements that can affect the cost of a metal roof include the following:

Location

More often than not, replacing an existing roof with a metal system or installing a new one is more expensive in cities with a higher cost of living.

Additionally, property owners should choose their roofing materials according to the area’s weather and climate.

Sturdy and durable materials are better options for properties located in areas that experience extreme weather, for example. As mentioned, others are even suitable for homes or buildings near the ocean, as they offer protection against saltwater damage.

If you live in an area with harsh weather conditions, you should install a durable roof. Since sturdy materials are more expensive, you may need a bigger budget. The same is true if the cost of living at your location is high.

beige traditional house

Labor Costs

Did you know that more than 50% of the cost of a new metal roof goes toward labor? This means that you’ll have to pay double what the material costs or even more for the entire project.

Labor costs often include the fee you pay for the services offered by the roofing contractor, scaffolding, and equipment.

How much money do you need to cover labor costs? This is also determined by several factors. However, they often start at $400 per sheet, which is around 100 square feet.

Roof Pitch

Another factor that influences the costs of a metal roofing project is the roof’s pitch.

Seasoned contractors often use a ratio that indicates how many inches the structure rises for every 12 inches in depth to measure the pitch. However, most properties have pitches between 3:12 and 6:12.

If the roof exceeds the 6:12 pitch, it’s considered “steep.” Since that means it’s more hazardous and complicated to work on that system, installation or replacement costs on a property with a steep-slope roof are higher.

These increased costs usually include the safety equipment contractors will need to use to work there.

Roof Shape

Since there’s no specific price based on the roof pitch or slope alone, roofing contractors also consider the roof shape to set a price for their work.

If the shape of the roof is complex, installation or replacement will likely cost more. The price for traditional gable and hipped roofing systems often ranges from $4 to $30 per square foot, for example. The same is true for Dutch roofs.

Additionally, mansard roofs and systems with dormer windows could cost up to $40 per square foot, which can add to the final cost.

Underlayment

As another essential element of a roof, the underlayment is installed directly under the deck to protect the structure against leaks.

However, the underlayment on your existing roof might not work for a new metal roof. Therefore, you should consider this additional replacement service to calculate costs.

Synthetic underlayment costs between 15 and 65 cents per square foot, for example, so it can significantly increase the total cost depending on the size of your roof.

green roof underlayment

Style

There are two metal panel profiles for this type of roof. These are:

Corrugated Metal Panels

Also known as “exposed fastener” roofing, corrugated metal is a cheap metal material with a wave-like appearance. These panels are also lightweight and easy to install over existing roofs.

Although corrugated metal panels make installation more simple, which can help reduce expenses, they aren’t as durable as others.

If temperatures constantly change, these panels can easily expand and contract. Improper installation can also cause extensive damage to roofs with this style.

Galvanized and galvalume steel panels are the most common options for corrugated metal roofs. On average, they cost between $4 and $6 per square foot, totaling $8,500-$12,000 for a 1,700-square-foot roof after adding labor costs.

Standing Seam Panels

With a vertical ribbed appearance and enhanced resistance against moisture, wind, weathering, and other conditions, standing seam roofing panels are an excellent and popular option for those who want to add curb appeal and protection to their properties.

These panels have raised ribs that conceal fastening, meaning that fastened parts aren’t subject to environmental hazards and other stresses that can cause deterioration over time.

Standing seam panels can be snap-locked together. However, depending on the type you choose, you may need metal caps to fasten the components in place.

While these panels can expand and contract with temperature changes, they’re more durable than corrugated metal panels.

Aluminum, zinc, and copper are the most popular roofing materials for this style of roof. Therefore, costs average $7-$13 per square foot but can be higher depending on the option you choose.

After combining material and labor, the average price for standing seam panels is between $12,000 and $23,000. However, costs can be much lower if you choose aluminum.

Trim/Flashing

An estimate for a roof installation or replacement should also include the metal trim and flashing, which depends on the type of material and style you choose for your roof.

Corrugated or exposed fastener panels are usually cheaper than a standing seam metal roof, but prices often vary.

If you prefer an exposed fastener system, the average costs for metal trim are as follows:

  • Between $2.50 and $4 per linear foot for eave trim
  • Between $2.50 and $4 per linear foot for gable trim
  • Between $3.50 and $5 per linear foot for ridge cap

However, if you prefer a standing seam system, these are the average prices for metal trim:

  • Between $5.50 and $8 per linear foot for eave trim
  • Between $5.50 and $8 per linear foot for gable trim
  • Between $7 and $10 per linear foot for ridge cap

silver steel roof flashing

Finishes

If you want your property to look beautiful and enhance its durability, you should also consider finishes.

These are the two common types of finishes that a roofing contractor usually uses for a metal roof:

  • Polyvinylidene fluoride (PVDF): This type of finish offers excellent protection against cracking and fading since it’s more resistant to outdoor elements. However, its composition is softer, so it may be easy to scratch.
  • Silicone-modified polyester (SMP): These coatings are harder, so they resist scratches and chalking better. This material forms a powder-like substance on the surface to protect against both. However, this type of finish can fade and crack due to exposure to UV rays.

Prices for these types of finishes vary, but PVDF coatings are around 15-30% more expensive than SMP alternatives.

Gutters

Your roof layout can also influence the cost. This also includes your existing gutter system. If it needs repair or replacement, the total price of the roofing project could be higher.

Most contractors charge around $10 per linear foot for gutter installation, which can add $1,000 and $7,000 to the total price.

If you have to install gutter guards for enhanced protection or to improve the roofing system’s performance, you’ll likely need more money.

Final Thoughts — Is A Metal Roof Worth It?

Before calling a roofing contractor and asking for a new metal roof installation, there’s another question you should answer – Are these roofing systems worth it?

As you can see, the costs of installing a metal roof are high. That’s why many people don’t even consider this material for their properties.

However, the truth is that metal roofs offer many benefits. Therefore, they’re an excellent option if you’re looking for the best value for money.

Additionally, not all metal roofing options are too expensive. If you ask your roofing contractor for advice and choose a cheap material, such as aluminum, you can enjoy all the advantages of metal roofs without spending a fortune.

Frequently Asked Questions

Determining how much money you need to install a metal roof depends on many factors, as several elements affect the price of these systems, including the material, roof pitch, style, your property’s location, and more.

However, the average for a 1,700-square-foot metal roof is $11,500, so you need at least that amount to install these types of systems on your property.

If you need more information about prices, don’t hesitate to request an estimate!

Metal roofing systems are usually more expensive than asphalt shingle roofs.

However, since they’re more durable and energy-efficient, metal roofs could help you save much more than asphalt shingle systems.


As mentioned, more than 50% of the cost of the metal roofing project goes toward labor costs. Although this can vary depending on the area where you live, the pitch and shape of your property, and other factors, most roofing contractors charge between $350 and $400 per sheet, which is about 100 square feet.


Metal roofs offer many benefits but also come with a few disadvantages, such as the following:

They’re more expensive than other types of roofs.
Metal roofs can be noisier than other types of materials when it’s raining or there’s a hail storm.
If improperly installed, metal roofs can have performance problems.
Metal roofs and their components can expand or contract if there are temperature changes.

How Much Does Roof Installation Cost in Texas?

How Much Does Roof Installation Cost in Texas?

Installing a new roof is one of the most significant home improvement investments for homeowners in their lifetime.

According to Forbes, $11,500 is the average roof replacement cost in the United States. However, a roof installation cost can range anywhere between $6,700 and $80,000 depending on the different factors, including roofing materials and location.

Let’s learn more about the factors affecting the roof installation costs, the different roofing materials available, and the cost of a new roof in Texas!

man standing in ladder beside roof

Factors That Affect Roof Replacement Costs

There are several factors that affect the cost of a roof replacement, some of which include the following:

Roofing Material

The type of roofing material you choose can have a significant impact on the cost of installing a new roof. There are many different options you can consider, each of them having their benefits and drawbacks.

Asphalt shingles, for example, are the most popular roofing material in the United States due to their relatively affordable price tag. They’re also lightweight and easier to install compared to the other materials.

However, the price range for asphalt shingles varies across the different types of shingles. Three-tab shingles are the most inexpensive roofing material, while on the other hand, the cost of 30-year premium architectural shingles lies on the higher end.

Labor

Labor typically makes up 60% of the total roof replacement cost. It’s important to consider roofing professionals with extensive experience, as even a minor mistake can lead to expensive repairs or replacements down the road.

The labor costs of replacing a roof in Texas can vary depending on many factors, including the roofing material you choose. Asphalt shingles, for example, are cheaper to install as they’re easier to work with compared to slate roofing.

Other factors that can affect the labor costs of replacing a roof in Texas include the roof pitch (steepness) and the geographic location of the house. A steep roof or a home in a hard-to-access area can drive up labor costs.

Homeowners can expect to pay a flat rate between $2 and $7 per square foot for labor. However, some roofing contractors may charge by the hour.

Location

In recent years, some parts of Texas have been severely affected by extreme weather conditions, such as blizzards, thunderstorms, hail, and tornadoes.

If you live in an area affected by extreme weather conditions, be prepared to pay more, as it can make it more challenging for the roofing contractor to install a new roof.

On average, a new roof costs around $7,000 to $12,000 or more.

man standing on roof underlayment

Roof Size

Homes with large roofs can cost more money, as roofing contractors have to work with more materials and dedicate extra time to the project.

Corrugated metal roofs, for example, cost up to $11.50 per square foot, which translates to $11,500 for a 1,000-square-foot roof size.

However, it’s important to note that the specific shape of the roof can also affect the roof cost in Texas. Hard-to-access parts or steeper roofs can drive this one-time investment beyond the abovementioned example.

Removal Costs

Before a roofing contractor can install a new roof, they must remove the existing material and haul it away to a dumpsite. This can be the most challenging and expensive part of the project, costing homeowners between $1 and $5 per square foot.

The Average Roof Material Cost Per Square Foot

Contractors in Texas provide new roof cost estimates per square foot or roofing square. Here are the different types of roofing materials and their average costs per square foot:

Asphalt Shingles

Three-tab shingles can cost around $4.25, while the price for premium asphalt shingles can go up to $8.25.

Aluminum Shingles

Considered to be a higher quality roofing material than asphalt shingles, aluminum shingles can cost between $8.50 and $13.75.

Cedar Shingles

Since cedar shingles require more effort to produce, they’re much more expensive than asphalt shingles, costing between $8 and $14.30 per square foot.

Clay, Concrete, or Copper Tiles

Installing a tile roof costs much more than other roofing materials. Clay tiles will cost you around $12 to $24.75, while the price of concrete tiles is between $11 and $19.80. 

Copper tiles are the most expensive option, costing homeowners between $21 and $39.70 per square foot.

Flat Roofing Materials

Rubber and PVC are the two most common options under flat roofing materials. Although they’re cheaper than shingles and tiles, they’re much more challenging to work with because of higher labor costs. 

Ethylene propylene diene terpolyme is a synthetic rubber roofing material that starts at $5.50 and goes up to $7.50 per square foot.

flat roof underlayment

Slate Tiles

If you’re looking for a durable roofing material that doesn’t break the bank, you may want to consider slate tiles. Although they’re slightly more expensive than aluminum shingles, they offer numerous advantages, including fantastic fire-resistant properties. 

Slate tiles can cost between $12 and $22 per square foot.

Standing Seam Metal Panels

This type of roofing system uses raised seams to connect the metal panels. 

The cost of standing seam metal panels ranges between $10 and $17.05 per square foot, which is much more than corrugated metal (up to $11.50).

Steel Shingles

Like aluminum shingles, steel shingles are a mid-range option for homeowners, costing up to $12.65.

Zinc Tiles

Due to a lower supply, zinc tiles are one of the most expensive roofing materials, and their cost per square foot can range between $18 and $28.

Full Vs. Partial Texas Roof Replacement Cost

In some cases, you may be able to avoid the hefty investment by considering a partial roof replacement.

If your roof has signs of damage in certain parts due to a storm or other extreme weather conditions, a roofing contractor may suggest a partial roof replacement. It can help you save money on materials and labor.

However, if your existing roofing does not meet the local building codes, you may have to replace the entire roof. 

An experienced roofing contractor can help assess the condition of your roof and guide you on the available options.

Should You Repair Your Roof Instead Of Replacing It?

Whether you have asphalt shingles or metal roofing, the first step is to assess its condition. Replacing the entire roof should be the last thing on your list, as sometimes you can simply carry out minor repairs to extend the existing roof’s lifespan.

Roof replacements are a huge investment and can disrupt the homeowner’s lifestyle for the entire duration of the project. An experienced roofing contractor in Texas can help determine whether repairing the roof is the best option.

Peeling shingles, leaks, and ridge caps are common roofing issues that you can easily resolve with a quick repair job. On average, repairing a roof in Texas can cost between $150 and $7,000, depending on the scope of work.

Here are the average roof repair costs:

  • Underlayment replacement: Between $2 and $3 per square foot
  • Repairing vent: Up to $250
  • Ridge cap repair or replacement: Between $200 and $750
  • Insulation replacement: Up to $2,500

Structural issues, rot and molds, and pest infestation are serious roofing issues. In such circumstances, it may be crucial to install a new roof.

two roof experts on roof

Is Roof Replacement A DIY Project?

After reading about the roofing costs in Texas, you may be wondering whether you can replace your existing roof and install a new one to save some money.

Although you may be able to save between $2 and $7 per square foot on labor costs if you were to carry out the project without professional help, it may not always be the best option. Replacing a roof is an advanced DIY job that requires extensive experience and skills.

If you don’t have the necessary skills and experience to install a new roof, it can lead to costly roofing repairs in the future. Even minor issues can result in water damage, structural problems, and molding, adversely impacting your financial situation.

Call An Experienced Roofing Contractor For A Quick Estimate!

Replacing your old roof and installing a new one can help you save money on labor costs. However, there are a lot of risks that can lead to costly roofing errors.

In some cases, you may not require a new roof, as a partial roof replacement can help resolve minor issues, ensure the structure’s integrity, and prolong the roof’s lifespan. This can save you a lot of money.

Austin Roofing Company and Water Damage Restoration has over 25 years of experience repairing and replacing residential and commercial roofs in Texas. They have the skills and expertise to conduct a quick inspection and guide you on whether to consider replacing or repairing the roof.

Call (512) 820-6505 to request a free roof inspection with a detailed cost estimate!

Roof replacement costs vary depending on several factors, including roofing materials. An asphalt shingle roof can cost between $4,250 and $8,250, while homeowners can expect to pay up to $11,500 for 1,000 sq ft of corrugated metal roofing.

It’s important to understand that these are averages, and the roof’s pitch, location, and labor can significantly affect the roofing cost in Texas. An experienced roofer can provide a detailed estimate after a quick inspection.

On average, homeowners in Austin pay between $5,466 and $11,669 for a new roof. Depending on the location, materials, roof pitch, and other factors, roofing costs can exceed $11,500.

Although a full roof replacement cost can be a hefty investment for homeowners in Austin, Texas, it’s essential to understand that a new roof can last between 30 and 50 years if properly maintained.

Most roofers will charge between $3.50 to $5.50 per roofing square for installing a new roof.

It can be tempting for homeowners to choose the cheapest contractor to save money. However, choosing a roofer based on its labor charges is not a wise decision, as it may lead to costly repairs.

You must conduct your own research on the roofing company before hiring. Check out the reviews left by previous clients and assess the roofer’s qualifications and experience to know whether they’re the right fit for the job.

According to HomeAdvisor, the average cost to install a roof in Texas is around $7,500. However, it can cost between $5,000 and $11,500 or more, depending on the roof size, pitch, materials, location, and other factors.

Although replacing a roof can cost a lot of money, it’s crucial for you to understand that it can improve the value of your home, which is perfect if you intend to sell your house within a few years!

What Is TPO Roofing? A Comprehensive Guide to These Roofing Systems

What Is TPO Roofing? A Comprehensive Guide to These Roofing Systems

TPO roofing is an increasingly popular choice for commercial and residential use, providing many benefits over traditional roofing materials. But what exactly is TPO roofing? In this article, we will discuss the advantages of TPO roofs, how to install them, and what potential drawbacks you should be aware of before deciding.

Are you looking to upgrade or replace your current roof? TPO (thermoplastic polyolefin) may be your perfect option! It’s a single-ply membrane offers superior weather protection against wind and rain and is environmentally friendly due to its reflective properties. Plus, it’s easy to install, meaning less time for contractors.

From understanding the basics of TPO roofs to learning about their pros and cons compared to other options like asphalt shingle roofs or metal roofs, this article provides helpful information about why you should consider installing a TPO membrane on your home or business building. We’ll explore all these topics throughout our discussion so that readers can make an informed decision when considering which type of roof best suits their needs.

What Is TPO Roofing? Exploring The Benefits of A Single Ply Membrane

TPO roofing is a single-ply membrane becoming increasingly popular with homeowners and commercial property owners. It provides superior protection against the elements while remaining lightweight, easy to install, and cost-effective. It also offers excellent UV resistance and can be recycled after its lifespan.

So, what makes this type of roofing so appealing? Thermoplastic polyolefin (TPO) is an environmentally friendly material that reflects heat better than traditional materials like asphalt shingles or metal roofing. It means lower energy bills for you in the long run as well as a longer life for your roof since the sun won’t be able to damage it as easily. Additionally, TPO roofs are highly durable and resistant to water damage caused by heavy rain or snowfall – something other roofs may not offer.

Lastly, one of the most significant benefits of investing in a TPO roof is its low maintenance requirements; unlike other roofs requiring regular cleaning or repair work every few years, TPO requires minimal upkeep once installed correctly. And when repairs become necessary due to wear and tear over time, they’re usually simple enough for even novice DIYers to take care of without having to call in a professional contractor each time. With all these advantages combined, it’s no wonder why more people choose this type of roof over others!

Now that you know about the many benefits of TPO roofs, let’s move on to understanding their installation and maintenance requirements.

Understanding Installation And Maintenance Requirements For TPO Roofs

When it comes to installing and maintaining a TPO roof, there are several things you need to consider. From the installation process to the ongoing maintenance requirements, understanding what’s involved is essential for any homeowner or business looking into this type of single-ply membrane roofing system.

The actual installation process of a TPO roof can vary depending on the size and scope of your project and local building codes and regulations. Generally speaking, though, there are three main components: an insulation board layer that provides additional protection against weather elements; a thermoplastic polyolefin (TPO) membrane that acts as both a water barrier and UV protector; and finally, fasteners that securely attach the membrane to your home or building structure. Installing all these pieces correctly for your TPO roof to function properly over time is essential.

In addition to proper installation, regular maintenance is also crucial for keeping up with your TPO roof. It includes checking for signs of wear, such as tears or cracks in the membrane material, every few months and inspecting flashing areas like chimneys or skylights where leaks may occur more quickly due to their proximity to other parts of your home or building structure. Taking care of minor issues before they become significant problems will help ensure maximum longevity from your TPO roofing system while saving you money on costly repairs.

Ultimately, taking the time to understand how best to install and maintain a TPO Roof will pay off later by helping protect one’s investment long-term, making it easier to decide if this type of single-ply membrane is right when weighing out pros & cons.

Is TPO Right For Your Home or Business? Weighing The Pros & Cons

TPO is a popular choice for residential and commercial buildings. What are the pros and cons of installing TPO?

  • One major pro is that TPO roofs are incredibly durable; they can last up to 30 years with proper maintenance! They’re also highly resistant to ultraviolet rays from the sun, which makes them ideal for sunny climates. Additionally, you’ll save money in the long run because they don’t require much upkeep or repair work over time.
  • On the other hand, there are some drawbacks to consider, particularly regarding installation costs. While TPO roofs may be cheaper initially than other roofing materials, such as asphalt shingles or tile roofs, their installation requires specialized tools and experience that can add significantly to your overall bill. Furthermore, since these materials aren’t fireproof like other options today, they won’t protect against fires if an emergency arises in your home or business property.

Ultimately, TPO provides many advantages over traditional roofing materials, such as durability and affordability – when weighing all factors carefully – it might only sometimes be right for you depending on your budget limitations or specific needs around safety requirements, etc. Be sure to research more into this before deciding – so that you know what kind of roof will best suit your circumstances!

roofer repairing a flat roof

In this blog post, we discussed the benefits and drawbacks of TPO roofing. We explored how it is a single-ply membrane that is easy to install and maintain but can be more expensive than other types of roofing materials. It is also durable in extreme temperatures and does not require frequent maintenance or repairs. However, it may not be suitable for all climates due to its limited fire resistance rating.

I believe TPO roofs offer excellent value for many homeowners and businesses with their cost-effectiveness and long lifespan. If you’re looking for a durable option that won’t need too much maintenance over time, this could be the right choice. Do your research before making any decisions to know what type of material will work best in your climate conditions!

Ultimately, whatever kind of roofing system you choose should meet all your needs while fitting into your budget – whether it’s TPO or something else entirely! So, take some time to explore all available options before settling on one that works best for you.

How long will a TPO roof last?

The average TPO roof will provide between 20 to 30 years of use. However, it is important to remember that a roofing system’s longevity depends on several factors, such as maintenance practices, the quality of the installation, and the kind of climatic conditions it is exposed to.

Is a TPO roof a good roof?

Yes. Although TPO might be cheaper, it offers excellent durability and energy savings. It’s also much easier to install than other roofing systems and is resistant to UV rays, with the ability to withstand various climatic conditions.

However, it is essential to remember that the quality of the installation and the maintenance practices that a homeowner exhibits will also impact the overall longevity of your roof. This is why it is essential to hire a reputable roofing contractor to install your roof and ensure you regularly inspect it and promptly address any issues.

Which is better, TPO or EPDM roofing?

EPDM and TPO roofing systems are both great options for homes and businesses. They both produce flat roofs. However, the option that’s best for you will depend on your unique needs. TPO roofing offers UV ray resistance, which makes it a fantastic option for those who live in areas that receive moderate to high heat.

On the other hand, EPDM tends to absorb more heat than TPO roofing, making it preferable for colder climates. Another thing to remember is that TPO roofing is more resistant to punctures than EPDM, so you may have to conduct regular repairs to your EPDM roof than you would with a TPO roof.

Why is TPO used in roofing?

TPO is mainly used in roofing systems because it reflects light. This is important because heat absorbed by a roofing system can cause the home to be warmer, resulting in a greater need for cooling. This increases energy costs, so many go for a TPO membrane roof.

It is also lauded for its durability and resistance to punctures or tearing, making it suitable for various weather conditions, including hail, snow, and heavy rain. Installation is quick and easy compared to other roofing materials, which can also help to save on labor costs.

Can you paint a TPO roof?

Absolutely. TPO roofing can be painted to suit your aesthetic needs and preferences. However, it’s essential to consult a contractor and ensure you use the correct paint type for a long-lasting result. Remember that TPO is also available in different colors, so be sure to inquire about your options for style and color before installing a new TPO roof.

Does TPO require underlayment?

Underlayment is an additional layer that can offer added protection and insulation to your roofing structure. An underlayment, like the cover board, is often made from gypsum. It can increase the fire rating of buildings, but it isn’t a must for TPO roofing.

Guide to the Best Roofing Nails for Your Roof

Guide to the Best Roofing Nails for Your Roof

Finding suitable materials is essential when repairing or installing a roof. Your roof plays a vital role in protecting your home from the elements, so it’s essential to do your research.

There are many different types of roofing nails, so knowing which one best suits your application can be confusing. This comprehensive guide will provide everything you need to know about roof nails.

What Are Roof Nails, Anyway?

A roof nail is a type of nail that is used for attaching metal sheets, shingles, or tiles to the surface of a roof structure. These nails are generally much thicker and longer than standard nails, guaranteeing a firm grip on the roof deck.

Since they are often exposed to harsh weather conditions, such as rain and snow, roof nails often use corrosion-resistant materials like galvanized steel to prevent rust. They have several head types that distribute the load while preventing the tearing of the roofing material.

To improve grip, the shank might be smooth or ringed. Roofing nails with these characteristics offer long-lasting and dependable fastening for roofing materials while preserving the roof’s structural integrity.

Types of Roofing Nails

The type of nail you use is crucial since it directly affects how well the roofing materials are in place. There are three types of nails, namely:

  • Smooth shank nails,
  • Ring shank, and
  • Screw shank

Each nail type has a different application, so you would generally use it for a specific application. In the section below, we’ll provide insight into each type of nail and what it’s used for.

Screw Shank Nails

Suppose your roof is made from wood. In that case, screw shank nails are handy. This type of nail is excellent at fixing shingles even in adverse weather due to its unusual twisted shank.

Its flattened head and diamond tip, which enable it to penetrate roofing shingles without producing undue stress, are also distinguishing traits.

Ring Shank Nails

Ring shank nails, often called electro-galvanized roofing nails, are made from galvanized steel and are larger than regular nails. They are used to secure asphalt roofing shingles and felts, which they do well, but due to their relative bluntness compared to other types of roofing nails, they have been known to cause tension.

Smooth Shank Nails

On the other hand, smooth shank nails are significantly less expensive than other roofing nails. They are said to be suitable for those looking for roofing materials at an affordable price. However, they do not offer as much holding power and are susceptible to harsh weather conditions, which you will need to keep in mind if you decide to go with these nails for your roof.

roofer using a nail gun

When Determining Which Roofing Nails to Choose, It’s Important to Look at the Gauge, Length, and Size

Once you have chosen the correct type of nail, you will need to look at the dimensions.

Despite their various gauges, sizes, and lengths, all roof nails have two distinguishing characteristics: a flat, broad head and a short shank. This unique design ensures that they can puncture a wide range of materials without causing any damage.

The gauge and length suitable for an application will vary depending on the material used and the job type you’re working on. An optimal gauge, or diameter, ranges from 10 to 12. Moreover, roof nails can be between one and six inches long, although the most common lengths are one to two inches, ideal for standard asphalt shingles.

However, if you install a roof over pre-existing shingles or use thick, wooden shingles, you will most likely require one 1/4-inch nails.

A roof nail should be sufficient to make a nail hole in the shingle or metal sheet and then at least 3/4 inch into the plywood or roof decking beneath. Because sheathing thickness varies, longer nails may be required depending on the roof decking chosen.

Roofing Nails Are Available In Various Materials

It’s also important to think carefully about the material of your roofing nails when using them on roofs. That’s because the material will determine how well the nail holds up when it experiences tension. In the section below, we’ll look at some of the most common roofing nail materials to help you make the right choice.

Aluminum Nails

Aluminum nails are a robust option for securing metal roofing. However, they tend to rust when in contact with salt, so they should not be used in coastal areas.

Electro-galvanized Roofing Nails

These nails are specially made by coating the metal nails with a layer of zinc. This makes them more resistant to rust and degradation, meaning they are the nail of choice for many roofing projects. Since they aren’t affected by moisture and salt, they are frequently used in coastal areas.

Copper Nails

Copper nails are common roofing nails that provide fundamental benefits in many situations and for many various types of roofing. However, other types of nails may be more advantageous and offer greater resilience.

Steel Nails

Stainless steel nails are more rust-resistant than aluminum, providing excellent support for ceramic and slate roofing tiles.

Consult a Professional for Help Choosing the Correct Roofing Nails

The truth is that choosing the proper roofing nails is essential. After all, they are vital structures in your roofing system, so you must choose nails that will stand the test of time. We recommend consulting a local professional for advice on the best nail types for your project.

A roofing contractor can offer expert guidance and ensure that the type of nails you’re using suits your area’s climatic conditions.

Roofing Project Keeping You Up at Night? We Are Here to Help

Repairing or installing a roof is no easy endeavor. From choosing the wrong materials to installing them incorrectly, a lot can go wrong. This is why it’s best to contact a reliable roofing contractor to make the job easier.

At Austin Roofing & Water Damage, we have what it takes to complete the job on time and within your budget. We also have extensive experience with roofing nails, so that you can turn to us for expert guidance.

To learn more, contact us today!

Frequently Asked Questions

What kind of nails do you use on a roof?

The type of roofing nails you use for your roof will depend on the roofing materials you are working with. Screw shank nails are generally recommended for hardwood, while ring shank nails are recommended for asphalt shingles and felt.

Smooth shank nails can be a cheaper alternative to these two types. We recommend consulting a professional roofing contractor to learn more about the best nail type for your project.

It’s important to note that regular nails should never be used for roofing projects. The results could be disastrous. Always ensure that your nails are a sufficient length to prevent the shingles from coming loose.

How big should roofing nails be?

The size of your roofing nail will depend on the roofing material that will be used. Generally, your roofing nail should be long enough to penetrate the shingle and go at least 3/4 of an inch into the decking or plywood beneath.

Should roofing nails come through the roof?

Roofing nails should ideally come through the shingles and into the structure beneath. However, you should never see them sticking out of the roof, which can pose safety risks.

Different Types of Metal Roofing: Guide For Homeowners

Different Types of Metal Roofing: Guide For Homeowners

Many homeowners choose metal roofs for their properties because they’re high-quality and functional. Compared to other popular options, they’re also the longest-lasting.

There are different types of metal roofing, which means you will have endless opportunities to add a unique touch and curb appeal to your home.

However, you shouldn’t pick just the one that can add more aesthetic value to your property. Other factors like durability and price are crucial to choosing the best option.

Do you want to install a metal roof in your house? Here’s everything you need to know about the types of metal roofing, the differences between each one, and how to choose the right one for your property.

What Are the Different Types of Metal Roofing?

There are many options for metal roofing materials, but that is not the only thing that defines the multiple types available. Each system may also vary in terms of style and fasteners.

Based on that information, the different types of metal roofing may fall into the following categories:

  • Metal roofing materials
  • Metal roofing fasteners
  • Metal roofing styles

Metal Roofing Materials

If you want to install a metal roof on your property, these are the materials you’ll likely find:

Aluminum Roofs

Aluminum roofs are popular for homeowners who prioritize durability, protection, and resistance against the elements. In addition, these systems offer superior energy efficiency.

Advantages

  • Aluminum doesn’t rust, so it’s ideal for coastal applications and climates with heavy rainfall.
  • It only weighs 5 lbs per square foot, so it’s the lightest roofing material. Also, it’s easy to work with and install.
  • Aluminum doesn’t get as hot as steel panels. Plus, it takes less time to cool down, so it will maintain properties cooler when temperatures rise. As a result, you’ll save money.
  • It’s a durable material and can last up to five decades if you perform proper maintenance.

Cons

While it’s a great material, aluminum also has a few cons. As mentioned, it doesn’t rust. However, it will oxidize if you don’t use a pain system suitable for your area’s climate.

aluminum roof panel

Copper Roofs

Copper roofs are pretty expensive but give properties a unique look and style. Furthermore, this material is one of the best options for roof shapes.

Advantages

  • Copper is an eco-friendly alternative to most roofing materials since it’s recyclable. Producing this metal doesn’t involve high resource exploitation.
  • This material has a long lifespan and can last up to 75 years if properly installed.
  • It’s lightweight, so it doesn’t cause immense strain on your property, avoiding potential damage to the structure.
  • Copper can reflect heat, keeping your home cooler.

Cons

Copper is a good choice for many reasons, but it’s so costly and can lose shape if extreme weather changes.

Zinc Roofs

This metal roofing material is also durable and sustainable. While not as sturdy as others, it can easily be cut into different shapes.

Advantages

  • The zinc develops a patina that offers protection and may even fill in scratches.
  • This material is stylish and is available in different pigmented finishes to give your property an original appearance.
  • It’s a sustainable material and requires less energy to be converted into panels, so you can be sure you won’t harm the environment if you choose it.
  • Thanks to the patina, the zinc develops, and these systems can last for many years.

Cons

Unfortunately, the zinc’s patina can take two to 30 years to develop. Therefore, it could have a uniform appearance.

white metal roof panel

Stone-Coated Steel Roof

Combining zinc and aluminum alloys or steel panels with a stone granules coating, stone-coated steel roofs are highly durable and strong. These systems are among the most recommended for today’s properties.

Advantages

  • A stone-coated steel roof can last between 40 and 70 years if well-installed.
  • Steel roofs don’t absorb heat but reflect it, keeping homes cooler during the summer and reducing energy costs.
  • Although sturdy, stone-coated steel roofing is easy to install because it’s lightweight.
  • It’s resistant to the elements and doesn’t wear down easily from exposure to water.

Cons

Installing stone-coated steel roofs is very expensive. Also, these systems are quite loud, so you may have to spend more money on soundproofing materials.

Metal Roofing Styles

Also, there are different roofing styles. These are:

Corrugated Metal Roofing

If you choose corrugated metal roofing, you’ll install metal sheets shaped into a corrugated pattern on your property. This style is popular among homeowners who prefer aluminum systems. It often has exposed fasteners.

Advantages

  • Although most corrugated metal roofs are aluminum, some models are zinc and copper.
  • If you choose aluminum, a corrugated roofing system is affordable and durable.
  • These roofs have industrial aesthetics, so they’re great options for a metal roof with a traditional, rustic look.
  • It’s resistant to fire, wind, and moisture. Therefore, this is a great choice for areas with extreme weather conditions.

Cons

While durable, a corrugated metal roof has exposed fasteners, so the structure can wear out and cause leaks.

Standing Seam Metal Roofing

A standing seam metal roof is a sleek and modern option with flat, vertical panels and fasteners hidden under the ribs on the sides.

Advantages

  • While standing seam metal roofs are typically made of steel, you can also find aluminum and copper models.
  • Since they have hidden fasteners, standing seam roofs don’t require regular maintenance.
  • This style goes well with contemporary homes and adds curb appeal to properties.
  • With a painted finish, a standing seam roof will withstand the elements.

Cons

Installing a standing seam metal system for the first time is around three times more expensive than installing asphalt shingle roofs. Also, it makes noise when it rains.

Stone-Coated Metal Roofing

Although they have steel sheets, these roofs are coated with stone granules that resemble the texture and color of other roofing materials, such as traditional asphalt shingles or wood shakes.

Advantages

  • Stone-coated metal roofing doesn’t need soundproofing materials since granules act as sound-absorbing cushions.
  • The granule’s infrared pigments reflect sunlight, boosting energy efficiency.
  • These systems are considerably more durable than asphalt shingle roofs.
  • A stone-coated metal roof can increase a property’s value by 5% to 25%.

Cons

Upfront costs to install these roofs are considerably higher. In addition, the process usually takes more time.

house with stone coated metal roofing

Metal Roofing Fasteners

These are the different metal roofing fasteners you can choose from:

Exposed Fasteners

Exposed fastener metal roofs have panels fastened and screwed directly onto the structure.

In these structures, the heads of the fasteners aren’t covered by a seam but are visible as a lining on the panel.

Advantages

  • Exposed fastener roofs are generally less expensive than hidden fastener roofs. Therefore, they’re a good choice for homeowners on a tight budget.
  • These systems are easier to install than hidden fastener roofs.
  • If a fastener becomes loose or damaged, it’s relatively easy to replace it. You won’t have to replace the roofing panels.

Things to Keep in Mind

  • Exposed fastener panels have a more industrial or utilitarian look than hidden fastener roofs.
  • There’s a greater potential for water to penetrate the roof system through the fastener holes.
  • Exposed fastener roofs typically have lower wind ratings than those with hidden fasteners. As such, they aren’t suitable for areas prone to high winds.

Hidden Fasteners

Essentially, hidden fastener metal roofs are those where the fasteners are concealed beneath the roofing panels. In other words, they aren’t visible.

These fasteners secure the panels from the sides or below, so they’re typically clips or brackets attached to the roof deck or framing.

Advantages

  • Hidden fastener metal roofs have a much cleaner and more polished appearance than exposed fastener roofs.
  • The risk of water penetrating the roof system through the fastener holes is low. Therefore, these systems are weather-resistant.
  • Hidden fastener roofs typically have higher wind ratings, so they can withstand high winds and outlast exposed fastener systems in areas with extreme weather conditions.

Things to Keep in Mind

  • Hidden fastener roofs require careful, trickier installation that should only be handled by experts.
  • These systems are more expensive due to higher material and labor costs.
  • Repairing or replacing these roofs can also be difficult or require larger investments.
metal roof panel

Final Thoughts

As you can see, there are different options if you want to consider a metal roofing material for your property.

Overall, metal roofing panels are more expensive than asphalt shingles. However, the investment is worth it, as they’re more durable and resistant.

However, remember that you should get an experienced roofer’s help installing a metal roofing system.

An experienced roofer can also advise you to choose the best metal roofing material, style, and fastener for your property. Contact us!

Frequently Asked Questions

Are There Different Styles of Metal Roofing?

Yes, you can find different styles of metal roofing on the market. The most common include standing seam, corrugated panels, stone-coated metal sheets, and traditional metal shingles.

Each style has its characteristics, advantages, and disadvantages. Plus, they can be used for many looks and designs.

What Is the Most Popular Type of Metal Roof?

The most popular type of metal roof is standing seam metal roofing, used for modern residential and commercial structures.

Many homeowners choose standing seam metal roofing because of its durability and energy efficiency. Also, it requires low maintenance.

Are Metal Shingles Expensive?

Metal shingles can be more expensive than traditional asphalt but are more durable and long-lasting.

While buying and installing metal shingles may be higher, this material can help you save money in the long run. Metal systems have enhanced longevity and don’t require regular maintenance compared to asphalt shingle roofs.