How To Repair Flat Roof Leaks: A DIY Guide for Austin Homeowners

How To Repair Flat Roof Leaks: A DIY Guide for Austin Homeowners

Flat roof leaks are one of the most common maintenance issues we’ve seen on Austin homes, additions, and small commercial buildings. The combination of intense UV exposure, sudden hailstorms, and standing water after heavy rain creates conditions that test every flat roof system eventually.

This guide covers what an Austin homeowner can safely do to identify and patch a minor flat roof leak, the materials and safety precautions involved, and the warning signs that mean it’s time to call a professional. Working on a flat roof isn’t as dangerous as a pitched roof, but it carries real risks. We’ll walk through how to do this work safely and honestly tell you when the job is beyond a DIY fix.

Why Flat Roofs Leak in Austin

Central Texas weather’s hard on flat roof systems. Three factors drive most of the leaks we see:

UV degradation is the biggest long-term factor. Austin’s intense summer sun breaks down the top layer of asphalt-based systems, modified bitumen, and the seams of TPO and EPDM membranes. Over years, the surface becomes brittle and develops microcracks that turn into leak paths.

Ponding water makes everything worse. Flat roofs aren’t actually flat. They’re sloped slightly toward drains, but if drainage isn’t maintained or the structure has settled, water collects in low spots. Standing water accelerates membrane breakdown and finds its way through any small weakness.

Storm damage is the third major source. Hail punctures or bruises membranes. High wind can lift seams or peel back flashing. After Austin’s severe weather events, even an undamaged-looking flat roof can develop leaks within weeks as compromised areas open up.

Identify the Source First

The trickiest part of any flat roof leak repair is finding the actual source. Water rarely enters directly above the stain on your ceiling. Instead, it travels along the underside of the roof deck, along joists, or through the insulation until it finds a spot to drip down.

Start inside, then move to the roof. Locate the interior leak point and measure its distance from a fixed reference (an exterior wall, a chimney, a vent stack). Then go up on the roof and find the corresponding location. The actual leak source is usually within 5 to 10 feet of that point, often uphill from it.

What to look for on the roof surface:

Cracked or bubbled membrane around vents, skylights, chimneys, and other roof penetrations. These flashings are the single most common leak source.

Open or split seams on EPDM and TPO membranes. Seams that have shrunk, lifted, or cracked are easy to spot once you know what to look for.

Punctures from hail, fallen branches, or foot traffic. Even small punctures can leak significantly during heavy rain.

Standing water marks. Water lines and dirt rings show where water collects. The leak is usually at the edge of these areas, where ponding water has tested the membrane longest.

Damaged or missing scuppers, drains, or downspout connections. If the drainage system has failed, water finds another way out.

Materials You’ll Need

For a minor patch repair on most flat roof systems, you’ll need basic materials available at any home improvement store:

Roofing cement or sealant compatible with your roof type. Asphalt-based roof cement for built-up roofing and modified bitumen. EPDM-specific sealant for rubber roofs. TPO uses welded patches or TPO-specific sealants. Read the label and match the product to your roof system.

Patch material. For small punctures, a square of compatible membrane is best. For asphalt-based roofs, peel-and-stick patches work well. For EPDM, an uncured rubber patch with primer and adhesive. For TPO, a heat-welded patch is required and is generally not a DIY repair.

Roofing fabric or mesh for reinforcement when patching with roof cement.

A putty knife or trowel for spreading sealant.

A wire brush for cleaning the area before patching.

A bucket of clean water and rags for cleaning the membrane surface.

Safety gear: gloves, eye protection, non-slip shoes, and a stable extension ladder rated for your roof height.

Safety First Before You Climb

Working on a flat roof is safer than a steep slope but not without risk. We’ve seen homeowners get hurt because they treated flat-roof work as casual. A few rules:

Never work on a flat roof alone. Always have someone on the ground who can call for help if needed.

Check the weather. Wet membranes are slippery. Hot membranes (above 95°F in direct sun, which is most Austin summer afternoons) can soften and become unstable underfoot. The best time for DIY flat roof work in Austin is early morning during spring or fall.

Use a proper ladder. Extension ladders should extend at least 3 feet above the roof edge and be secured against shifting. Step ladders aren’t safe for roof access.

Check the roof structure first. Flat roofs sometimes have soft spots where the decking has rotted underneath. If your foot sinks even slightly when you step, get off the roof immediately and call a professional. The decking may have failed.

Watch for skylights and roof openings. Sun glare can hide openings. Walk slowly and know where every penetration is.

If you’ve a fear of heights, balance issues, or any mobility concerns, this isn’t a DIY project. Call a pro.

Step-by-Step: Patch a Minor Flat Roof Leak

For a small puncture or seam failure on an asphalt-based or EPDM flat roof, the basic repair sequence is straightforward:

Step 1. Clean the area. Sweep away any loose debris with a broom, then scrub the membrane surface around the damage with a wire brush. The patch won’t bond properly if there’s dirt, oxidation, or old failing sealant in the way. Clean an area roughly twice the size of the damage.

Step 2. Dry the area completely. Sealants and adhesives won’t bond to wet surfaces. If you’ve just cleaned with water, give the area at least an hour of direct sun or use clean rags to wipe it dry.

Step 3. Apply primer if your patch material requires it. EPDM patches require a specific rubber primer. Asphalt patches usually don’t.

Step 4. Cut your patch material to size. The patch should extend at least 3 inches past the damage in every direction.

Step 5. Apply sealant or adhesive to the membrane in the patch area. Spread evenly with a putty knife. Don’t go thick. A thin, even layer bonds better than a heavy gob.

Step 6. Press the patch into the sealant. Work from the center outward to push out any air bubbles. The patch should be fully flat against the membrane.

Step 7. Apply a second layer of sealant around the edge of the patch. This seals the edges and prevents water from getting under the patch.

Step 8. Check the seal after 24 hours. The first rainstorm is the real test. If it still leaks, you’ve either missed the source or the patch didn’t bond properly.

Done right, a patch repair on a flat roof can last 5 to 10 years. Done poorly, it can fail in weeks.

How Different Flat Roof Systems Differ

Not all flat roofs are the same, and DIY repair varies significantly by system:

Modified bitumen. This is asphalt-based with a fiberglass or polyester reinforcing layer. It’s one of the most DIY-friendly flat roof systems. Use asphalt-based roof cement and modified bitumen patches. Heat application is sometimes required but cold-applied patches work for most homeowner repairs.

EPDM (rubber). A single-ply black rubber membrane common on commercial buildings and some residential additions. EPDM repair requires EPDM-specific primer and uncured rubber patches. The repair process is straightforward but the materials are specialized.

TPO and PVC. White single-ply membranes that require heat welding for proper seam and patch repair. This isn’t a DIY repair. A handheld heat welder costs hundreds of dollars and using it incorrectly damages the membrane.

Built-up roof (BUR). Multiple layers of asphalt and felt, sometimes topped with gravel. Patches are similar to modified bitumen. If the gravel layer is missing in spots, that’s a sign the underlying asphalt has failed and the roof may need professional assessment.

If you’re not sure what type of flat roof you’ve, the membrane color and texture usually tells you: black smooth rubber is EPDM, white smooth membrane is TPO or PVC, dark gritty or granular surface is modified bitumen, and gravel-topped is BUR.

When DIY Isn’t Enough: When to Call a Professional

Some flat roof leaks need professional repair regardless of how handy you are. Call a pro when:

Multiple leaks are showing up at once. This usually means the membrane’s reached the end of its service life and patching won’t fix the underlying problem. The roof needs assessment and possibly replacement.

You can’t find the source after careful inspection. Hidden leaks tracking through insulation or decking can develop into serious structural problems. A professional has moisture-detection equipment that finds what your eyes can’t.

The decking feels soft underfoot. Soft spots mean rot has set in below the membrane. Walking on a rotted deck is a fall risk and the structural repair is beyond DIY.

Ponding water covers large areas. If your roof holds standing water 48 hours after rain, the drainage system or roof slope’s failed. This is an engineering problem, not a patch repair.

The leak is around a major flashing (chimney, parapet wall, skylight). Flashing repair done incorrectly creates worse leaks. Major flashing work requires removing surrounding membrane, replacing the underlayment, and reinstalling. This is a multi-day professional job.

Storm damage with active leaks. If a storm just hit and water is actively coming in, professional emergency tarping followed by proper repair protects your home better than a DIY patch in wet conditions.

A leak you can’t reach safely. If accessing the leak requires more than basic ladder skills, the value of avoiding a fall outweighs any DIY savings. Hospital bills cost much more than a roofer.

We do all this work daily at Austin Roofing Company & Water Damage. As GAF Master Elite Contractors with 25+ years of combined roofing experience, we handle flat roof systems across Austin, the Hill Country, and Central Texas. Most flat roof repair calls start with a free inspection.

Maintenance Tips to Prevent Future Leaks

Most flat roof leaks are preventable with regular maintenance:

Inspect twice a year. Spring and fall are ideal. Look for cracks, lifted seams, blistering, and damaged flashing. Catch problems before they become leaks.

Clear drains and scuppers. Debris buildup is the most common cause of ponding water. Clear leaves, twigs, and dirt from drains every season.

Trim overhanging branches. Falling limbs puncture membranes. Branches rubbing against the roof surface wear it down. Keep tree limbs at least 6 feet away from the roof edge.

Walk the roof carefully after storms. Hail and high wind events warrant a same-day or next-day inspection. Damage spotted within 48 hours of a storm is much easier to claim on insurance than damage discovered months later.

Re-coat aging membranes. Modified bitumen and BUR roofs benefit from periodic recoating with an elastomeric or aluminum coating. This extends membrane life and reflects heat, which is significant in Austin’s climate.

Document everything. Keep dated photos of your roof condition. If a storm causes damage later, before-and-after photos are essential for insurance documentation.


Frequently Asked Questions

How long does a DIY flat roof patch typically last?

A properly done DIY patch on a sound flat roof system can last 5 to 10 years. Patches done in poor conditions (wet, hot, dirty surface) or with incompatible materials may fail within months. The longer the underlying membrane has, the longer a quality patch will last.

Should I repair my flat roof or replace it?

If your flat roof has passed the 20-year mark and showing multiple problem areas, replacement usually makes more sense than continued patching. Newer roofs with isolated damage are good repair candidates. We provide free inspections to help homeowners make this call without pressure.

Will my homeowner insurance cover flat roof leak repair?

Insurance typically covers leak repair when the damage results from a covered event like hail, wind, or fallen branches. Wear-and-tear repairs are usually not covered. If your leak appeared after a recent storm, document it and call your insurance company before doing repairs that could affect your claim.

Can I patch a flat roof leak in the rain?

No. Sealants and adhesives won’t bond to wet surfaces. Emergency tarping can keep water out until the roof dries enough for proper repair. If you’ve an active leak during a storm, contain interior water damage and call a roofing company for emergency tarping if the leak is significant.

How do I know if my flat roof system is TPO, EPDM, or modified bitumen?

Look at the membrane surface. White and smooth is TPO or PVC. Black and smooth (slightly rubbery feel) is EPDM. Dark gray or black with granular or smooth bitumen surface is modified bitumen. If you can’t identify the system, take a photo and a roofing contractor can tell you over the phone or during a free inspection.

Need professional help with a flat roof leak? Call Austin Roofing Company & Water Damage at (512) 820-6505 for a free inspection. We’re GAF Master Elite Contractors with 25+ years of combined roofing experience, BBB A+ accredited, and 1,200+ five-star reviews from Austin homeowners. We serve Downtown Austin, East Austin, Mueller, Hyde Park, South Congress, Tarrytown, Lakeway, Bee Cave, Round Rock, and Cedar Park.

How to Repair a Hole in Your Roof: A Practical Guide

How to Repair a Hole in Your Roof: A Practical Guide

A hole in the roof’s one of the few home emergencies where you’re able to make a significant difference in damage outcomes if you act quickly. Water flowing through an unsealed roof hole damages insulation, drywall, framing, electrical, and finishes faster than most homeowners expect. The first 24 hours matter.

This guide’s about temporary repair techniques you can do yourself, when those techniques are appropriate, and the situations that require professional response. We’ve been responding to roof emergencies across Central Texas since 2012, drawing on 25+ years of combined experience. Our credentials are available on WDR’s Austin roofing history page: GAF Master Elite® Contractors with 1,200+ five-star Google reviews and BBB A+ accreditation. WDR’s Austin roofing history.

If you’ve got water entering the home now, don’t read this guide, call (512) 820-6505 or visit our emergency roof repair contact page. It’s what we’re here for. Same-day response across most of the Austin metro.emergency roof repair contact emergency roof repair contact.

When DIY Repair Is Appropriate

Some roof holes can be temporarily sealed by homeowners. Others shouldn’t be DIY attempts.

Appropriate for DIY temporary repair:

  • Small holes (under 2 inches) visible from interior attic inspection
  • Holes from known causes: small fallen branches, displaced flashing, missing single shingle
  • Single-story roof with safe ladder access
  • Daytime, dry conditions, low wind
  • Materials available: tarp, lumber, screws, plywood
  • Homeowner physically capable of safe ladder work

Not appropriate for DIY:

  • Holes larger than 4 inches (structural damage likely)
  • Holes caused by trees, severe wind, or hail (insurance claim documentation needed)
  • Multiple holes (suggests broader damage pattern)
  • Active leaks during rain (wait for safe conditions or call professional emergency response)
  • Two-story or steep roofs
  • Holes near electrical service entrance, vents, or HVAC penetrations
  • Anyone uncomfortable with ladder work at height

If your situation doesn’t fit the “appropriate for DIY” criteria, skip ahead to the professional response section.

Tools and Materials for DIY Temporary Repair

Gather before climbing the roof.

Required:

  • Heavy-duty plastic tarp (minimum 6’x8′, preferably 12’x16′ for larger coverage)
  • 2×4 boards, 4 to 8 feet long (for anchoring tarp edges)
  • 1.5 inch wood screws or roofing nails
  • Cordless drill or hammer
  • Sturdy ladder rated for your weight plus tools
  • Work gloves
  • Safety glasses

Useful additions:

  • Sandbags (50 lb capacity each, fill with sand or gravel)
  • Plastic sheeting for interior leak containment
  • Headlamp if working in attic
  • Camera or phone for documentation

For temporary patches (small holes only):

  • Roofing cement (caulk-tube or quart can)
  • Fiberglass roofing fabric or fiberglass mesh
  • Putty knife or trowel

Step-by-Step Emergency Tarping (The Most Common DIY Action)

For most holes, what you’re doing DIY isn’t patching, it’s emergency tarping over the damage. Tarping protects the roof while you’re arranging permanent repair.

Step 1: Confirm safe conditions.

Check weather forecast. Wait for dry conditions, low wind, and daylight. Never work on a roof during active rain, high wind, or thunderstorm.

Step 2: Locate the hole from above.

Walk the roof perimeter and visually identify the hole. If water’s leaking inside, mark the interior leak location first, then look on the roof above that point. Hole may be slightly higher than the interior leak (water travels down rafters and decking).

Step 3: Position the tarp.

Roll out the tarp so it extends at least 4 feet beyond the hole on all sides. The tarp should cover the hole AND extend over the roof ridge if possible (this prevents wind from getting under the tarp).

Step 4: Anchor the upper edge first.

Place a 2×4 board across the upper edge of the tarp (the side facing the ridge or higher portion of the roof). Screw the 2×4 through the tarp into the roof decking. Use 6 to 8 screws spaced 12 to 18 inches apart.

Step 5: Anchor the side edges.

Place 2×4 boards along each side edge. Screw through the tarp into the decking. The side boards prevent wind from lifting the tarp.

Step 6: Anchor the lower edge.

The lower edge can be anchored with a 2×4 (as above) or with sandbags weighting the tarp down. Sandbag method causes less roof damage but isn’t appropriate in high-wind areas.

Step 7: Inspect from the ground.

After tarping, view the work from the ground at multiple angles. Confirm the tarp covers the full hole, edges are secure, and no flapping is visible.

How to Patch a Small Hole (Under 2 Inches)

For small clean holes in known-cause situations, a temporary patch may hold until professional repair. This isn’t a permanent fix.

Step 1: Clean the area.

Remove loose debris, dirt, and any displaced shingle granules from around the hole. Surface must be dry and clean for adhesive to bond.

Step 2: Apply roofing cement.

Spread a 3-inch ring of roofing cement around the hole using a putty knife. Cement should be 1/8 to 1/4 inch thick.

Step 3: Press fabric into the cement.

Cut a piece of fiberglass roofing fabric 2 inches larger than the hole on all sides. Press the fabric into the wet cement, working out air bubbles from center toward edges.

Step 4: Apply second cement layer.

Cover the fabric with another layer of roofing cement, extending 1 inch past the fabric edges. Smooth the surface with the putty knife.

Step 5: Document and schedule professional inspection.

Photograph the patch from multiple angles for warranty and insurance records. Even if the patch holds, you’ll want a professional inspection within 2 to 4 weeks. A small visible hole often indicates broader damage not yet visible.

Interior Damage Containment

While you arrange roof repair, contain interior damage.

Position containers under active leak points. Buckets, mop buckets, or plastic storage bins. Empty regularly during active leaking.

Move valuables out of the affected area. Electronics, important documents, furniture, anything sensitive to water damage.

Open soaked drywall to release water. A ceiling that’s holding water from a roof leak will eventually fail, and it’ll fail catastrophically. Puncturing a small drain hole in the lowest point of a water-filled ceiling bulge releases water in a controlled way. Place container below first.

Don’t run electrical fixtures in the affected area. If water is entering near light fixtures or outlets, turn off power to that circuit at the breaker until professional inspection.

Document everything for insurance. Photo every affected room before cleanup. Insurance carriers require pre-cleanup documentation for claim purposes.

When and How to Call Professional Help

Several situations require contacting a professional roof repair team immediately, not DIY tarping.

Call for emergency response when:

  • Active leak with water entering the home faster than containers can manage
  • Tree fall, branch impact, or other structural damage
  • Hole larger than 4 inches or visible structural damage to rafters or decking
  • Multiple holes across the roof
  • Holes near electrical or HVAC components
  • Two-story or steep roof requiring specialized safety equipment
  • Storm conditions making DIY work unsafe
  • Insurance claim documentation required

What to expect when you call.

We’ll dispatch crews to most Austin metro emergencies within 2 to 4 hours of your call. Hill Country corridor (Lakeway, Bee Cave, Dripping Springs) responses are 4 to 6 hours. The dispatcher confirms damage details, your address, and active conditions before sending the crew.

What we do on arrival.

First priority is stopping the bleeding. Emergency tarping covers active leak zones. Damaged areas get temporary stabilization. We’ll document everything with photos for your insurance claim, including damage that wasn’t visible from inside the home. Then we schedule permanent repair.

For full details on our emergency response process, see the emergency response page linked above.

After the Emergency: Planning Permanent Repair

A patched or tarped roof’s a temporary state. Permanent repair should happen within 1 to 4 weeks, it’ll depend on weather and your repair team’s schedule.

What permanent repair involves.

A professional repair team removes the temporary patch or tarp, inspects the underlying damage (decking, underlayment, framing), and rebuilds the damaged area to original or better condition. This isn’t just covering the hole. It’s restoring the roof system.

When the hole indicates broader problems.

Holes from impact damage (hail, branches) often indicate widespread damage not visible at the impact point. A thorough inspection of the full roof identifies any related damage before quoting permanent work.

Insurance considerations.

Most Texas homeowner policies cover holes caused by storms, wind, hail, fallen trees, and similar perils. Coverage depends on your specific policy and deductible. Document everything before cleanup. We provide insurance-ready damage reports for your carrier.

When repair becomes replacement.

A single small hole rarely warrants roof replacement. Multiple holes from a severe hail event sometimes do. Our roof replacement assessment can determine whether targeted repair or full replacement is the right approach.

FAQs About Roof Hole Repair


How long can a tarp protect my roof?

A properly installed tarp can protect a roof for 30 to 90 days. UV exposure degrades tarp material over time, and storm conditions can lift even well-installed tarps. We’d recommend permanent repair within 2 to 4 weeks of any tarping event.

Will roofing cement permanently fix a hole?

No. Roofing cement is a temporary fix only. The cement degrades under UV exposure within months to a few years. A proper repair involves removing damaged decking, replacing underlayment, and installing matching shingle or tile material. Cement-only patches are temporary at best.

How much does professional roof hole repair cost?

Roof hole repair cost depends on size, location, accessibility, and the type of roofing material. Small holes in standard shingle roofs cost less than holes in tile or metal systems. We provide free written estimates after inspection so you know costs before any work begins. Insurance-covered repairs are billed to the carrier following the adjuster meeting.

Can I just leave a small hole and seal it from inside?

No. Sealing a roof hole from inside the attic doesn’t waterproof the roof. Water continues to enter the decking and rot the structure even if visible interior leaking is reduced. All roof holes need to be repaired from the outside.

What causes holes in a roof?

Common causes include fallen tree branches, hail impact damage, lifted or missing shingles exposing decking, deteriorated flashing failing around vents or chimneys, animal intrusion (squirrels, raccoons), and HVAC or solar panel installation damage. Identifying the cause helps determine whether other damage may exist.

Should I file an insurance claim for a small roof hole?

Generally yes if the cause was a covered peril (storm, hail, falling tree). Even if the visible damage seems small, related damage to underlayment, decking, and framing often exists. Professional inspection documents the full scope of damage for the claim. Wear-and-tear damage is typically not covered.

How fast can WDR respond to a roof hole emergency?

Most Austin metro emergencies see a crew on site within 2 to 4 hours of the initial call. Hill Country corridor (Lakeway, Bee Cave, Dripping Springs) responses are 4 to 6 hours. Crews are on call 24/7 throughout the year. During major storm events, arrival times may extend.

Where We Serve

We provide emergency response and permanent roof hole repair across the entire Austin metro and Hill Country, including central Austin (Downtown Austin, East Austin, Mueller, Hyde Park, South Congress, Tarrytown), the Hill Country corridor (Lakeway, Bee Cave, West Lake Hills), the western corridor (Dripping Springs), the northern suburbs (Round Rock, Cedar Park, Pflugerville, Georgetown, Leander, Hutto), and the southern suburbs (Buda, Kyle, Manor).

For more on our specific Austin roofing services across the metro, see our Austin roofers on call 24/7 page.

How To Repair a Tile Roof: A DIY Guide for Austin Homeowners

How To Repair a Tile Roof: A DIY Guide for Austin Homeowners

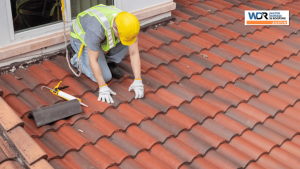
Tile roofs are common in Austin neighborhoods like Tarrytown, Bee Cave, Hyde Park, South Congress, and the Hill Country suburbs. They last decades, but individual tiles do break. A cracked or missing tile lets water reach the underlayment, and once the underlayment fails, you’re looking at a much bigger repair.

This guide covers what an Austin homeowner can safely do to replace a single broken tile and what work belongs to a professional. Tile roofs aren’t as DIY-friendly as asphalt shingle roofs because the tiles crack under foot pressure and the work happens at heights that aren’t forgiving. We’ll walk through how to do this safely, when the job is genuinely manageable, and when calling a roofer is the right call.

Why Tile Roofs Crack or Break

Tile is durable but brittle. Most tile damage in Austin comes from one of four sources:

Foot traffic. This is the single biggest cause. HVAC technicians, satellite installers, gutter cleaners, painters, and homeowners themselves walking on tile roofs incorrectly crack tiles. The damage often isn’t visible from below and goes undetected until a leak develops.

Falling debris. Branches dropped during storms, especially from older live oaks, hit tiles with enough force to crack them. Even a small dead branch falling from height can break a tile.

Hail. Large hail (1.5 inches or more) can crack concrete tiles and shatter clay tiles. Smaller hail typically doesn’t damage tile but may damage the underlayment over time through repeated impacts.

Age. Tile itself lasts 50 to 100 years, but tiles do fatigue. Older clay tiles can develop spider-web cracks. Concrete tiles can spall at edges where freeze-thaw cycles have stressed the material. Austin’s freeze-thaw events in recent winters have accelerated this for some roofs.

Identifying Damaged Tiles

From the ground, look for these signs:

Slipped tiles. A tile that has shifted out of its original position is often missing the fastener that held it in place. Look at horizontal courses across the roof and watch for a tile that’s clearly out of line with its neighbors.

Missing tiles. Obvious dark gaps in the tile pattern. From the ground, missing tiles look like dark squares or rectangles in the tile field.

Visible cracks. Larger cracks are visible from the ground with binoculars. Look for white or light-colored lines across tile faces that indicate cracks letting through underlayment color.

Debris on the roof surface. Sometimes tile fragments from breakage are visible on lower courses or in the gutters. Gutter debris check is a good early-warning system.

From the roof (when safely accessible), check for hairline cracks, edge spalling, and slipped tiles by walking the bottom edges only. Never walk on the centers of tiles. Each tile is supported only at the top edge where it laps over the course below, and stepping on the center is what cracks them.

Interior signs include water stains on ceilings, especially after heavy rain. By the time interior staining appears, the leak has been active for some time and the underlayment may already be damaged.

Tile Types You Might Have

Austin homes have several tile types. Each requires different replacement materials and techniques:

Concrete tile. The most common in Austin since the early 1990s. Heavy, durable, available in many profiles. Concrete tiles can be ordered through specialty roofing suppliers and most home improvement retailers carry common profiles.

Clay tile. Classic Spanish Colonial and Mediterranean style. Lighter than concrete but more brittle. Replacement clay tiles for older homes can be harder to source if the manufacturer is no longer producing the exact profile.

Flat profile. Modern tiles that lay flat against the roof surface. Common on Tuscan and contemporary architectural styles.

Barrel or mission profile. Half-pipe shaped tiles in alternating concave-convex patterns. Classic Spanish style. Replacement requires matching both the profile and the color.

S-tile. Continuous curve from concave to convex in a single tile. Common on Mediterranean and Spanish Revival homes. Most common modern profile.

If you’re unsure what type you’ve, take a clear photo from below or remove a sample tile from a discreet location. Most roofing supply houses can identify the profile and color from a photo or sample.

Materials You’ll Need

For replacing a single broken tile, gather these materials before starting:

Replacement tile. Match the profile, color, and material. Even within concrete tiles, profiles vary significantly. Bring a photo or a sample piece to your roofing supplier.

Pry bar. A small flat pry bar or roofing bar for lifting the overlapping tile to access the broken one.

Wire brush. For cleaning mortar or debris from the area.

Hammer and nails (or screws). To re-secure the new tile. Use galvanized or stainless steel fasteners, not standard nails which rust.

Roofing sealant. A small tube of sealant compatible with tile (silicone or polyurethane). Don’t use asphalt-based sealants on tile.

Walking boards or roof ladder. For weight distribution. These are critical for working on tile roofs safely.

Safety gear: Non-slip shoes (rubber soled, never leather-soled), eye protection, gloves, and a stable extension ladder.

Safety First: Walking on Tile

Tile roof safety is different from other roof types and deserves careful attention. The risks are real:

Tiles crack underfoot. Walking the wrong way on a tile roof breaks the tiles you’re walking on, creating more damage than you started with. This is the most common DIY tile repair failure.

Tiles are slippery. Even dry, tile is more slippery than shingles. Wet or dusty tile is significantly more slippery. Algae growth on tiles increases the slip risk further.

Falls from tile roofs are serious. Tile roofs are heavier and often steeper than asphalt roofs. A fall from a tile roof, especially with broken tile fragments under you, can cause severe injury.

Safety rules for tile roof work:

Use walking boards. A wide board or specialized roof ladder distributes your weight across multiple tiles and reduces breakage. Don’t try to work directly on the tile surface.

Walk on the bottom 3 inches of each tile only. This is where the tile is supported by the course below. Never step on the center of a tile.

Walk along the rake (edge) when possible. Edges have more structural support than the field.

Never work in wet conditions. Tile and water don’t mix for DIY work. Wait for a dry day.

Use a safety harness for any work above the second floor. This isn’t optional. A safety harness anchored properly is the difference between a slip and a hospital visit.

Don’t work alone. Always have someone on the ground who can call for help.

If you’ve any concerns about heights, balance, or the slope of your particular roof, stop here and call a professional. The cost of a single tile replacement by a pro is much less than the medical cost of a fall.

Step-by-Step: Replace a Single Broken Tile

For a straightforward single broken tile on a sound roof with accessible damage, the replacement process follows this sequence:

Step 1. Position your walking board across at least 3 courses of tile near the damaged area. The board should bridge tiles, not concentrate weight on any single one.

Step 2. Identify the broken tile. Carefully sweep away any loose fragments. Note how it sits in the field relative to neighbors. The new tile needs to sit in exactly the same position.

Step 3. Lift the tile above (the one whose bottom edge laps over the broken tile). Slide your pry bar gently under its bottom edge and raise it just enough to free the broken tile beneath. Don’t lift more than necessary. Wood shims can hold the raised tile in position.

Step 4. Lift the tile below if the broken tile is held in place by the course below as well. Most tile fields use a bottom support, so the broken tile is usually held by both the tile above and the tile below.

Step 5. Remove the broken tile. If fastened with a nail, pull the nail with your pry bar or cut it flush with bolt cutters. Remove all fragments.

Step 6. Inspect the underlayment underneath. The black or white felt or synthetic underlayment should be intact. If you see torn underlayment, deck rot, or daylight, stop here and call a professional. The repair you can do is no longer adequate.

Step 7. Position the replacement tile. Slide it into place from below the raised tile above. The new tile should rest in the same position as the original.

Step 8. Secure the new tile. Drive a galvanized or stainless steel nail or screw through the appropriate fastener hole (usually pre-formed at the top of the tile). Don’t overdrive. The tile shouldn’t be crushed by the fastener.

Step 9. Apply a small bead of sealant under the bottom edge if the original installation used sealant for additional weather sealing. This isn’t always needed but is common in Austin’s wind-prone areas.

Step 10. Lower the raised tile back into position. Make sure it sits flat. Step carefully off your walking board and check the repair from below.

The repair should be invisible from the ground when done correctly. Color match matters: even a slightly different color tile’s visible from the curb.

Color and Profile Matching

The single biggest reason DIY tile replacements look obvious is color mismatch. Tile colors fade over time, especially in Austin’s intense sun. A brand-new tile from the manufacturer rarely matches a tile that’s been on your roof for 15 or 20 years.

Three sources for matching tile:

Salvaged tile from your own roof. Many tile roofs have spare tiles stored in attics or sheds from the original installation. These are the best match because they’ve aged in the same conditions.

Salvaged tile from similar-age roofs. Demolition companies sometimes have salvaged tile. A few roofing suppliers in Austin specialize in matching salvaged inventory.

New tile, color matched. If you must use new tile, talk to your supplier about color matching. Some manufacturers offer “aged” finishes that approximate weathered tile color. The match won’t be perfect but is better than fresh-from-factory color.

Profile matching is less flexible. Tile profiles must match exactly to seat correctly in the field. A close-but-not-exact profile creates water entry points and looks wrong. If the original profile’s no longer manufactured, professional consultation is required to find a compatible alternative or to plan a section reroof using the existing tiles in visible areas.

What You Can’t DIY

Some tile roof work isn’t a DIY project. Call a professional when:

Multiple tiles are broken across a wide area. This usually means foot traffic damage from another contractor or storm impact. The right approach is a systematic inspection and replacement of all damaged tiles, not piecemeal patching.

Underlayment damage is visible. Once underlayment fails, replacing the tile alone doesn’t stop the leak. The tile must be removed, the underlayment replaced, and the tile reinstalled. This is multi-tile work involving careful sequencing.

Ridge or hip tiles are damaged. Ridge and hip tiles use mortar bedding and specialized installation techniques. Their replacement isn’t comparable to field tile work.

Valley or flashing damage. Tile valleys use metal flashings underneath the tile. Valley failure requires removing tiles, replacing the metal, and reinstalling. This is structural-grade roofing work.

Decking damage suspected. If the deck under the underlayment’s rotted, the roof needs structural assessment. Tile alone doesn’t fix this.

You can’t safely access the damaged area. Some tile roofs are steep enough or high enough that the safety calculation doesn’t favor DIY. The cost of a professional repair is much less than the cost of a serious fall.

Insurance claim involved. If recent storm damage may be covered by insurance, the documentation and repair process should be handled by a qualified roofer. Insurance adjusters are familiar with professional repair documentation and DIY work can complicate claims.

We do all this work daily at Austin Roofing Company & Water Damage. As GAF Master Elite Contractors with 25+ years of combined roofing experience, we handle tile roof repair and replacement for clay, concrete, and specialty tile systems across Austin, the Hill Country, and Central Texas. Free inspections are available.

Maintenance Tips for Tile Roofs

Tile roofs are durable but benefit from regular attention:

Annual inspection. Walk the perimeter and look at the field with binoculars. Catch slipped or cracked tiles before they create leaks.

Clean gutters and valleys. Debris buildup in valleys causes water to back up under tiles. Cleared valleys are essential.

Trim overhanging branches. Tile is brittle. Branches rubbing against tile wear down both the tile and the branch. Falling branches break tiles.

Limit roof traffic. Every contractor walking on your tile roof is a risk to tile integrity. Schedule HVAC, satellite, and similar work to minimize foot traffic. If contractors must access the roof, ask them about their tile-walking technique before they go up.

Document with photos. Annual photos of your tile roof condition help with insurance claims and let you track gradual changes over time.

Address moss and algae early. Algae and moss growth on tile is mostly cosmetic but holds moisture against the tile, which can accelerate aging. Soft-wash treatments handle this without damaging the tile.

Re-bed ridge mortar as needed. The mortar bedding under ridge tiles deteriorates over years. Crumbling mortar is visible from the ground and should be addressed before it allows ridge tile displacement.

Frequently Asked Questions

How long should a tile roof last in Austin?

Concrete tile typically lasts 50 years or more. Clay tile can last 75 to 100 years. The underlayment underneath usually fails first, often at 25 to 35 years, and may need replacement well before the tile itself reaches end of life. We can assess the underlayment condition during a free inspection.

Can I walk on my tile roof without breaking tiles?

Only on the bottom 3 inches of each tile, only along edges when possible, and only with walking boards distributing your weight. Even experienced roofers crack tiles occasionally. If you’re not comfortable with tile-walking technique, the safer choice is to call a professional.

Where can I find matching replacement tiles?

Start with your own attic in case the original installer left spares. If not, contact local roofing suppliers like ABC Supply, Texas Roof Supply, or similar specialty distributors. For obsolete profiles, salvage yards or manufacturer color matching may be required. We can help source matching tile during a repair project.

Will my homeowner insurance cover broken tiles?

Insurance typically covers tile damage from covered events like hail, wind, or fallen branches. Wear-and-tear damage and contractor-caused damage aren’t usually covered. If a recent storm damaged your tile, document the damage with photos and contact your insurance company before doing repairs that could affect the claim.

Should I replace just the broken tiles or recover the whole roof?

Depends on the age of the underlayment and the number of damaged tiles. If your underlayment’s past 25 years old and you’re seeing multiple cracked tiles, a full underlayment replacement (reusing existing tile where possible) may make more sense than ongoing repairs. A free inspection can tell you which approach fits your situation.

Need professional help with a tile roof repair? Call Austin Roofing Company & Water Damage at (512) 820-6505 for a free inspection. We’re GAF Master Elite Contractors with 25+ years of combined roofing experience, BBB A+ accredited, and 1,200+ five-star reviews from Austin homeowners. We work on concrete, clay, and specialty tile systems across Downtown Austin, Tarrytown, Hyde Park, Mueller, Lakeway, Bee Cave, and the Hill Country. Free inspections are available, and we’ll match your existing tile profile and color.

How Roof Leaks Lead to Water Damage: What Austin Homeowners Need to Know

How Roof Leaks Lead to Water Damage: What Austin Homeowners Need to Know

Austin’s frequent thunderstorms, hail events, and intense rain create real water damage risk for homeowners. A timely roof repair costs a fraction of what deferred water damage remediation requires. A roof that’s even slightly compromised can allow water intrusion that stays hidden behind walls and in attic insulation for months, until it shows up as mold, structural damage, or a stained ceiling. This guide explains how to prevent roof leaks from becoming water damage disasters.

Call WDR at (512) 820-6505 for a free inspection. We provide roof repair and water damage restoration throughout Austin.

How Roof Leaks Become Water Damage

roofer inspecting shingle debris on gutterA small leak at a flashing point or around a pipe boot doesn’t immediately drip through your ceiling. Water follows the path of least resistance, often along a rafter, through insulation, and into wall cavities, before it accumulates enough to show visible signs. By the time you see a water stain on your ceiling, the moisture has often been present in the structure for weeks or months.

In Austin’s humid summers, this moisture creates ideal conditions for mold growth. Black mold can establish in wall cavities within 48 to 72 hours of initial water contact. Structural framing, rafters, sheathing, and wall studs, can begin to rot within months of continuous moisture exposure.

The Most Common Leak Entry Points

Pipe boots and roof penetrations, The rubber collars around plumbing vent pipes degrade from UV exposure and Austin’s heat over 8 to 12 years. Cracked or split pipe boots are one of the most common sources of roof leaks we find during inspections.

Flashing failures at chimneys and skylights, Metal flashing expands and contracts with Austin’s temperature swings. Over time, sealants dry out, flashing pulls away from the roof surface, and water infiltrates. Step flashing at chimney bases is particularly vulnerable.

Valley failures, Open valleys carry high water volume during heavy Austin rain events. If valley metal corrodes or valley shingles deteriorate, water can bypass the roofing system entirely.

Ridge and hip cap blow-off, Wind damage to ridge caps leaves the most exposed section of the roof unprotected. After any significant windstorm, check that ridge caps are intact.

Early Warning Signs of a Roof Leak

Catching a leak early limits damage significantly. Watch for:

  • Water stains or discoloration on ceilings or upper walls
  • Peeling paint or bubbling drywall on interior surfaces
  • Musty odor in the attic or upper floors
  • Visible mold growth on attic insulation
  • Daylight visible through the roof deck in the attic
  • Increased heating or cooling costs (moisture-compromised insulation loses R-value)

If you notice any of these signs, call for a roof inspection service immediately. A leak that’s caught early requires a minor repair. A leak that’s been active for months may require structural remediation and mold treatment.

The Most Common Metal Roof Leak Entry Points in Austin Homes

Understanding where metal roof leaks originate helps you prioritize what to watch for between professional inspections.

Pipe boots are the rubber or metal collars that seal plumbing vent penetrations. They’re the single most common source of active roof leaks we find during Austin inspections, across all roof types, not just metal. Rubber pipe boots have a functional lifespan of 8 to 12 years in Austin’s UV and heat conditions. A split or cracked boot is a guaranteed leak path in the next significant rain event. We replace deteriorated pipe boots as a standalone repair service for as little as call for a free estimate, far less than the water damage that follows if the issue goes unaddressed.

Ridge and hip cap seams on standing seam metal roofs are designed to shed water, but sealant at end laps and penetrations can dry out over time. A poorly sealed end lap that performs fine for the first few years begins to allow wind-driven rain infiltration as sealant deteriorates.

Gutter attachment points on exposed fastener metal roofs are where many homeowners see their first signs of rust. The screws that hold gutters to the fascia and the fasteners that hold the lowest panel course to the structure are high-risk corrosion points on older exposed fastener systems. Rust staining on the fascia below the gutter line is usually the first visible sign.

Chimney flashing on older Austin homes, particularly those built in the 1990s and early 2000s, often relied on step flashing and counter flashing without proper sealant integration. After 20-plus years of Austin heat cycling, the counterflashing begins to separate from the chimney chase. This is one of the most common sources of intermittent leaks that homeowners can’t easily localize.

How Quickly Mold Develops After a Roof Leak

This is the question we’re asked most often after homeowners discover an active leak: how long do I have before mold becomes a problem?

In Austin’s climate, the answer is faster than most homeowners expect. Mold spores are present naturally in any indoor environment, and they need only moisture and organic material to begin colonizing. In summer conditions, 90°F+ temperatures, high humidity, mold can establish visible growth in wall cavities and on attic insulation within 48 to 72 hours of initial water contact.

In cooler months the timeline extends to three to five days, but the structural damage from moisture, wood rot in rafters and decking, can begin within weeks regardless of season.

This timeline is why WDR emphasizes acting immediately on any suspected leak, not waiting to see if it happens again. One rain event that introduces water into your attic structure is enough to create conditions for mold growth that becomes a remediation project.

We handle both sides of this: roof repair to stop the entry point and water damage restoration to address what moisture has already reached inside your home.oof repair to stop the entry point and water damage restoration to address what moisture has already reached. Working with one company for both, rather than coordinating a roofer and a separate restoration contractor, significantly compresses the response time.

What to Do When You Discover a Leak

Contain the water first. Use buckets to collect drips. If ceiling drywall is sagging or bulging, poke a small hole to release trapped water in a controlled location, letting it drain into a bucket is better than letting the ceiling collapse.

Move valuables away from the affected area. Water travels unpredictably. Move electronics, furniture, and items of value out of the potential damage zone.

Document everything. Photograph the leak, water stains, and any damage before any cleanup. This documentation is essential for insurance claims.

Call WDR for emergency service. We provide 24/7 emergency response for active leaks throughout the Austin metro. For emergency tarping and damage assessment, call (512) 820-6505 any time.

Water Damage Restoration

When a roof leak results in significant water infiltration, roofing repair alone isn’t enough. Water-damaged insulation loses its effectiveness and holds moisture that promotes mold growth. Wet structural framing needs to be dried, treated, and in some cases replaced. Drywall affected by water should be cut out rather than simply dried, wet drywall almost always develops mold.

WDR provides both roof repair and water damage restoration services, we handle the full scope of storm damage from roof to interior, so you’re working with one company rather than coordinating a roofer and a restoration contractor separately.

WDR handles roof repair and water damage restoration throughout Austin metro and the surrounding metro, Hutto, Manor, Lago Vista, Cedar Valley, and all of Central Texas. Call (512) 820-6505.

U.S. EPA, Mold and Moisture, The U.S. Environmental Protection Agency’s mold guidance outlines health risks, response timelines, and remediation standards for moisture-related issues in homes.

Frequently Asked Questions

How long can a roof leak go undetected?

Weeks to months. Water follows structural framing before accumulating visibly. By the time a stain appears on your ceiling, moisture has often been present in the structure for a significant time.

Can mold develop from a small roof leak?

Yes. In Austin’s climate, mold can establish in wall cavities within 48 to 72 hours of initial water contact. A small leak treated promptly is far less costly than one that’s allowed to develop into a mold remediation project.

Does WDR handle both roof repair and water damage restoration?

Yes. WDR provides both roof repair and water damage restoration services, handling the full scope from roof to interior so you’re working with one company.

What should I do immediately when I discover an active roof leak?

Contain the water with buckets, move valuables away, document everything with photos, and call WDR at (512) 820-6505 for emergency response. We’re available 24/7.

Will homeowner insurance cover water damage from a roof leak?

Most homeowner policies cover sudden and accidental water damage from a covered peril like a storm. Damage from long-term neglect or gradual deterioration may not be covered. Document promptly and contact your insurer quickly.

How can I prevent roof leaks in Austin?

Annual professional inspections, prompt repair of any identified vulnerabilities, regular gutter clearing, and maintaining attic ventilation are the most effective preventive measures. WDR inspections are free.

Your Austin Roof Replacement: A Complete Day-by-Day Timeline

Your Austin Roof Replacement: A Complete Day-by-Day Timeline

Most Austin homeowners have never watched a roof get replaced. When you’re spending call for a free estimate on a project, knowing what’s supposed to happen and when gives you confidence that the job is being done right. This is a realistic, step-by-step walkthrough of what a full roof replacement with WDR looks like, from preparation through the end-of-day walkthrough.

Before installation day, a few preparation steps make the process smoother:

  • Move vehicles from the driveway and at least 10 feet from the home’s perimeter
  • Relocate potted plants, outdoor furniture, and fragile items away from the structure
  • Inform immediate neighbors that work will be happening, roofing is loud
  • Secure or move pets indoors, our crews will be moving around the property all day
  • Remove wall art and anything fragile from shelves on interior walls, vibration from the tear-off can dislodge items

For homes with detached garages, pool equipment, or deck spaces adjacent to the structure, extra clearing is worth the effort.

For a free estimate in Austin, call (512) 820-6505 or request a free estimate.

Installation Day: A Complete Walkthrough

7:00 – 8:00 AM: Arrival and Setup

The crew arrives at your home and the first priority is protecting what is around your house, not the roof itself. Tarps go down over landscaping beds, air conditioning units, and any hardscape within ten feet of the structure. Ladders are staged at the primary access points, and scaffolding is set up on any face where the pitch or height requires it. Rolling scaffolding protects both the crew and your property. Material delivery typically arrives by 7:30 AM or was staged the prior afternoon. Once protection is in place and materials are on-site, tear-off begins.

8:00 – 10:00 AM: Tear-Off

The crew strips all existing roofing material down to bare decking. On a standard shingle roof this means removing shingles, underlayment, and ridge cap in sequence. Tile removal is slower and requires more careful handling. All material goes directly into a dump trailer at the driveway or curb, with a crew member staged below to manage debris flow and keep fasteners and shingle fragments from scattering across the yard. A clean tear-off site is both safer for the crew and easier to clear at end of day.

10:00 – 11:30 AM: Decking Inspection and Repair

After tear-off, the decking is fully exposed. We inspect every sheet of plywood or OSB for:

  • Soft spots indicating moisture damage or rot
  • Delamination or structural compromise
  • Improper fastening from prior installations
  • Previous water stains indicating historic leaks

Any compromised sections are replaced before anything goes on top. We’ll walk you through any additional decking replacement before proceeding so there are no surprises on the final invoice.

Any compromised sections are replaced before the underlayment goes down. The cost of decking replacement is communicated to you before we proceed, no surprises on the final invoice.

11:30 AM – 1:00 PM: Underlayment Installation

With clean, inspected decking, underlayment installation begins. Synthetic underlayment goes down over the entire deck surface, it is stapled or nailed at the top edge and laps with each successive course. Ice-and-water shield, a self-adhering rubberized asphalt membrane, goes down first at eaves (typically the first three feet), at all valley intersections, and around every penetration. This membrane self-seals around fasteners and bonds to the deck, creating a waterproof secondary barrier. This is the layer that prevents water from reaching your interior if any primary roofing material is ever compromised. It is not optional, and the quality of its installation, overlap dimensions, penetration integration, determines how well it performs.

1:00 – 4:30 PM: Shingle or Material Installation

Installation begins at the eave with starter course shingles, a factory-sealant product that bonds to the first field shingle course and prevents wind uplift at the roof edge. Field shingles follow in a staggered pattern with each course offset to prevent vertical seam alignment. Nail placement follows the manufacturer-specified nail line on the shingle face, nailing outside that zone reduces wind resistance and can void the warranty. Inspectors verify nail line compliance on permitted jobs, and our crews are trained to maintain it consistently. As installation approaches each penetration, the pace slows for correct flashing integration in the proper sequence.

4:30 – 5:30 PM: Ridge Cap and Final Details

Ridge cap shingles are the last roofing material to go down and the most exposed, they sit at the highest point of the roof where wind uplift is greatest, which is why correct nailing and adhesive sealing matters. Hip caps run the full length of each hip from ridge to eave. Both ridge and hip caps are hand-sealed with roofing cement at termination points.

Drip edge is verified at eaves and rakes. At eaves, drip edge should have gone down before underlayment; at rakes, after underlayment. This sequencing matters for how water sheds off the edge during heavy rain.

Final cleanup begins with the entire crew clearing the site: rolling magnets sweep the yard, driveway, garden beds, and any grass areas adjacent to the structure. Gutters are cleared of granules and shingle debris. The dump trailer exits the property.

End of Day: Walkthrough

Before the crew leaves, our project lead walks the completed roof with you. This walkthrough is not a formality, it is the moment to look at ridge caps, hip caps, all flashing points, and any penetrations together. If anything looks different from what was discussed, or if you have any question about what you’re seeing, raise it before payment is processed and before the crew disperses. We photograph the completed installation from multiple angles and log any decking that was replaced during the job. You receive the final invoice, warranty paperwork, and manufacturer warranty registration information at this point.

Multi-Day Projects

Several project types extend beyond a single day and require specific planning. Tile installations are the most labor-intensive, tile removal is slower than shingle tear-off, and tile laying requires more precision and drying time at mortar joints. Homes over 3,500 square feet of roof surface (not floor plan) with multiple ridge lines, dormers, and complex valleys typically require two days even with a full crew. Standing seam metal installations almost always span two days due to the precision required at seam formation and flashing integration. When your project requires multiple days, we cover all exposed decking with reinforced tarps each evening before the crew leaves, secured at eaves and rakes to protect against overnight weather. You will receive a specific schedule before work begins.

After Installation: What to Expect

roofer inspecting a tile roofRoof replacement comes with both a manufacturer’s material warranty and a WDR workmanship warranty. We provide documentation for both.

Schedule a free post-installation inspection one year after installation, we’ll verify flashing performance and check for any settling issues before the manufacturer warranty period begins to matter.

WDR completes roof replacements throughout Austin and the metro, Lakeway roofing, Dripping Springs, Georgetown, Leander, and all surrounding communities. Call (512) 820-6505 for a free estimate.

City of Austin Development Services, The City of Austin Development Services department handles roofing permits and coordinates inspections for qualifying residential replacements.

What Good Cleanup Looks Like

Cleanup is the part of a roof replacement that homeowners remember most, and it’s where you learn the most about a contractor’s standards. A professional job ends with the site in better condition than the crew found it.

Rolling magnetic sweeps cover the yard, driveway, garden beds, and any access paths. These heavy tools pull steel nails and staples out of grass and gravel before they cause problems with tires or bare feet. A single pass is a minimum, WDR crews make two.

Gutters get cleared of debris from the tear-off. This matters because old granules and shingle fragments will clog gutters if left in place, and the first significant rain event will flush them into your downspouts.

All old roofing material leaves the property the same day on every standard project. Some contractors stage debris for pickup the next day; WDR hauls the dump trailer off-site at the end of the job. Your driveway is clear when we leave.

The project lead photographs the completed roof before leaving. These photos document the finished installation and serve as your baseline record for any future warranty claims or insurance documentation.

After Installation: Your First Year

roofer installing a ventThe first year after a new roof installation is worth paying attention to, not because problems are likely, but because early detection of any issue, however rare, is far easier and cheaper to address than deferred discovery.

Schedule a free follow-up inspection 10 to 12 months after installation. WDR offers this as a standard service. We’ll verify that flashings are seated correctly after their first full heat cycle, check that pipe boots haven’t shifted, and confirm that ridge and hip cap sealant is intact heading into a second storm season.

Keep your warranty paperwork accessible. For GAF Golden Pledge and other enhanced warranties, register the warranty on the manufacturer’s website within the required window, typically 45 to 60 days after installation. WDR provides the documentation you need to complete registration.

Report any concerns promptly. If you notice a stain, a soft spot, or anything that looks out of place in the first 12 months, call us before investigating on your own. Rooftop access after installation carries the same fall risks it did before, let us handle the inspection.

Frequently Asked Questions

How long does roof replacement take in Austin TX?

Most residential replacements complete in one day. Larger homes, tile roofs, or complex rooflines may take two to three days. WDR provides a specific timeline with every estimate.

What time will the crew arrive on installation day?

WDR crews typically arrive between 7:00 and 8:00 AM on installation day.

Will I need to be home during the roof replacement?

You don’t have to be home the entire day, but we recommend being available for the end-of-day walkthrough to review the completed work.

What happens if it rains on my installation day?

WDR monitors weather and won’t begin a job that can’t be safely completed before rain arrives. If unexpected rain develops mid-job, we protect the exposed decking before stopping.

How long before I can walk on the new roof?

New asphalt shingles are walkable immediately after installation. Tile and metal have specific handling requirements we’ll review with you.

What do I do with the year after installation?

WDR recommends a free inspection one year after installation to verify flashing performance and check for any issues before manufacturer warranty periods begin.

Roof Warranties Explained: What’s Covered on Your Austin Home

Roof Warranties Explained: What’s Covered on Your Austin Home

Most Austin homeowners sign a roofing contract that includes warranty terms without fully understanding what those warranties cover, and what voids them. When a warranty claim arises years later, the differences between a strong warranty and a weak one become very real, very fast. We provide written warranty documentation on every installation throughout Austin, Cedar Park, Round Rock, Lakeway TX, Georgetown, and Bee Cave. Call (512) 820-6505 for a free estimate.

The Two Types of Roofing Warranties

Every roof installation comes with two separate warranties that cover completely different things. Most homeowners only learn this distinction when a problem arises.

The manufacturer’s material warranty covers defects in the roofing material itself, the shingles, panels, or tile. It does not cover how the roof was installed, and it does not cover storm damage. When a shingle fails prematurely due to a manufacturing defect, this warranty applies. When a shingle blows off in a windstorm, it does not.

Standard architectural shingles typically carry limited lifetime warranties, but the fine print matters significantly. Full replacement coverage usually applies only for the first 10 to 15 years. After that, coverage converts to prorated terms, meaning the payout declines as the roof ages. A shingle that fails at year 22 on a 30-year prorated warranty might yield less than 30% of replacement cost from the manufacturer.

The contractor’s workmanship warranty covers how the roof was installed, improper flashing, incorrect nail placement, faulty sealing, missed penetrations. This comes entirely from the roofing contractor, not the manufacturer. A contractor who goes out of business or moves on after storm season cannot honor a workmanship warranty. We have operated continuously in Austin for over 25 years. Our warranty is backed by a company that will still be here when you need it.

What Manufacturer Warranties Cover

Manufacturer warranties generally cover manufacturing defects, shingles that crack, delaminate, or lose granules prematurely due to a product defect rather than weather exposure or installation error. Algae staining is covered on products marketed with algae-resistant warranties, such as Owens Corning Duration with StreakGuard or GAF Timberline with StainGuard.

What they do not cover is a longer list. Storm damage from hail, wind, or fallen branches is covered by your homeowner’s insurance, not the shingle manufacturer. Improper installation voids coverage in affected areas. Inadequate attic ventilation, one of the most common warranty denial reasons in Austin, can void the entire warranty if ventilation does not meet the manufacturer’s minimum specifications. Foot traffic damage is excluded. Normal wear at the end of the stated lifespan is excluded.

The practical implication is that manufacturer warranties are most valuable in the early years of a roof’s life, when manufacturing defects are most likely to appear. As a roof ages, the prorated structure means remaining coverage may not cover actual replacement costs.

What Voids Your Roof Warranty

new asphalt shingle roofingInadequate attic ventilation is the single most common reason manufacturer warranties are denied in Austin. Most shingle manufacturers require a minimum of one square foot of net free ventilation area per 150 square feet of attic floor space, split evenly between intake and exhaust. We verify ventilation compliance before every installation to protect your coverage.

Installation over existing layers is another common void trigger. Most manufacturers require full tear-off to bare decking for the warranty to apply. Having a different contractor or an unlicensed roofer make repairs to your roof can also void coverage on affected sections, if your roof develops a problem while under warranty, call us first so we can assess and document before any repairs are attempted.

Mixing products from different manufacturers, using non-approved underlayment, or adding components not tested with the primary system can void the primary shingle warranty regardless of the quality of the individual components.

How to Protect Your Warranty Long-Term

Register the warranty promptly. Enhanced manufacturer warranties, including GAF’s Golden Pledge, require registration within 45 to 60 days of installation. We provide the documentation you need to complete this.

Schedule a free annual inspection to create a maintenance record. Some manufacturers deny claims if they can demonstrate the homeowner failed to reasonably maintain the roof. A documented inspection history removes that argument entirely. Keep your warranty certificate, workmanship warranty, and installation invoice somewhere accessible, these are the three documents you will need if a claim arises.

WDR Warranty Coverage

new roofingWe are GAF Master Elite certified, a designation held by fewer than 2% of roofing contractors in the United States. This certification gives our customers access to GAF’s Golden Pledge warranty, a non-prorated, transferable limited lifetime warranty covering both materials and workmanship for up to 25 years. It is not available through uncertified installers.

GAF’s contractor certification program, including Master Elite, offers enhanced warranty terms that provide Austin homeowners with significantly stronger coverage than a standard manufacturer warranty. Ask about enhanced warranty options during your free estimate.

Frequently Asked Questions

What is the difference between a limited lifetime warranty and a prorated warranty?

A limited lifetime warranty covers the roof for as long as you own the home, but the coverage terms may change over time. A prorated warranty reduces coverage proportionally as the roof ages, so a 25-year-old roof on a 30-year prorated warranty might receive only 17% coverage. Non-prorated warranties maintain the same coverage terms throughout the warranty period and are significantly more valuable.

Does a roof warranty transfer when I sell my Austin home?

Some manufacturer warranties are transferable to a new owner, either automatically or for a small fee. Enhanced warranties through certified programs are often transferable with proper registration. Workmanship warranties from the contractor typically do not transfer. Ask your contractor about transferability before installation.

How do I file a manufacturer warranty claim on my roof?

Contact the manufacturer directly using the contact information on your warranty certificate. Have your installation documentation, warranty registration, and photos of the issue ready. If you’re unsure whether the issue is a material defect or storm damage, call WDR first, we can inspect and advise before you file.

Can my roof warranty be voided if I add solar panels?

Potentially yes. Penetrations through the roof deck for solar panel mounting can void coverage in affected areas if not installed by an approved installer using approved methods. Before adding solar, check your roofing warranty terms and confirm the solar installer’s work won’t conflict.

What is a GAF Golden Pledge warranty?

The GAF Golden Pledge is one of the strongest residential roofing warranties available, a non-prorated, transferable limited lifetime warranty covering both materials and workmanship for up to 25 years. It’s available only through GAF Master Elite certified contractors. We are GAF Master Elite certified.

Does my warranty cover roof damage from a tree falling on my house?

No. Physical damage from fallen trees or branches is covered by your homeowner’s insurance, not your roofing warranty. Contact your insurer and document the damage promptly.